Pay
There’s a unique brand of modern angst that manifests the moment you decide to buy something online. While there’s no English word for it, it translates roughly to “Where is my credit card? What is its number? How badly do I actually want this thing, anyway?”.
When you’re on an iOS device, this ennui intensifies: there’s a good chance you don’t have your card with you, and holding your credit card and typing on your phone simultaneously is a feat best left to gymnasts and astronauts. (I’m sort of joking, but also willing to bet Apple has measured this in a lab somewhere.)
And if you’re a developer accepting credit card payments in your app, this unfortunate phenomenon is directly correlated to lost revenue.
Apple Pay changes all this. Though a lot of the attention around its launch has focused on physical payments in stores (where customers can use their iPhone to pay at NFC-enabled payment terminals), there’s an equally large opportunity for iOS developers to improve the checkout experience in their apps.
Just a reminder: if you’re selling digital goods or virtual currencies in your app, you should use In-App Purchases—not Apple Pay—to sell your content (See section 11.2 of the App Store Review Guidelines). You can use Apple Pay for selling physical goods and services.
Obtaining an Apple Merchant ID
You’ll have to register an Apple Merchant ID before testing anything out. Before doing this, you should choose a payment provider to actually handle your credit card processing. Apple provides a list of recommended ones at their Apple Pay Developer Page (disclosure: I work for Stripe, one of the recommended companies, but the code in this article doesn’t depend on you choosing any specific provider). While your provider should have a specific guide for how to get set up using Apple Pay with their platform, the process looks like this:
- Head to the
Certificates, Identifiers, and Profilessection of the Apple Developer center and create a new merchant ID. - Next, head to the Certificates section and create a new Apple Pay Certificate. This involves uploading a Certificate Signing Request (CSR) to Apple. When you’re signing up for a payment processor, they’ll typically give you a CSR to use. You can use a CSR that you generate yourself to follow along with this guide, but your payment processor won’t be able to decrypt payments made with it and you’ll need to redo it later.
- In Xcode, go to the “Capabilities” section of your project settings and turn “Apple Pay” to on. You may have to select the merchant ID you created earlier from the list provided.
Making Your First Charge
Apple Pay will only work on an iOS device capable of using Apple Pay (e.g. iPhone 6/6+, iPad Mini 3, iPad Air 2). In addition, you have to have successfully added the Apple Pay entitlement (described in “Obtaining an Apple Merchant ID”) in order to test it in your app. If you’d like to approximate its behavior on the simulator, you can find a testing library that mimics its functionality (with test credit card details) at https://github.com/stripe/ApplePayStubs.
Once you’re up and running with a merchant account, getting started with Apple Pay is really straightforward. When it’s time to check out, you’ll first need to see if Apple Pay is supported on the device you’re running and your customer has added any cards to Passbook:
let paymentAssuming Apple Pay is available, the next step is to assemble a PKPayment. This object describes the charge you’re requesting from your customer. If you’re requesting payment in the U.S. (reasonable, as Apple Pay is currently US-only), here’s some default options you’ll need to set that’ll likely stay constant:
let request = PKPaymentNext, describe the things the customer is actually buying with the payment property. This takes an array of PKPayments, which have a label and amount. They’re analogous to line items on a receipt (which we’ll see momentarily).
let wax = PKPaymentNote that you can specify zero or negative amounts here to apply coupons or communicate other information. However, the total amount requested must be greater than zero. You’ll note we use a PKShipping (inherits from PKPayment) to describe our shipping item. More on this later.
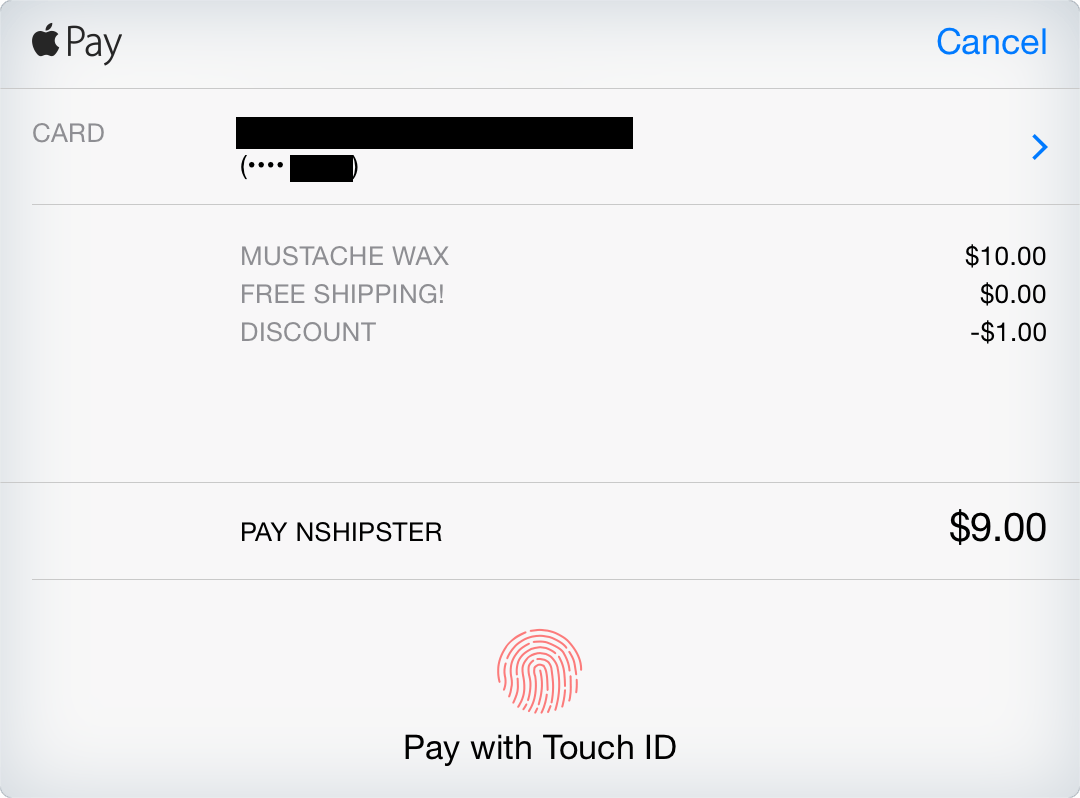
Next, to display the actual payment sheet to the customer, we create an instance of PKPayment with our PKPayment and present it. (Assume for this example that all this code is inside a UIView that will sit behind the payment screen).
let viewA few style nits to be aware of:
- The view controller doesn’t fully obscure the screen (in this case the blue background is part of our application). You can update the background view controller while the
PKPaymentis visible if you want.Authorization View Controller - All text is automatically capitalized.
- The final line item is separated from the rest, and is intended to display the total amount you’re charging. The label will be prepended with the word “PAY”, so it usually makes sense to put your company name for the payment summary item’s
label. - The entire UI is presented via a Remote View Controller. This means that outside the
PKPaymentyou give it, it’s impossible to otherwise style or modify the contents of this view.Request
PKPaymentAuthorizationViewControllerDelegate
In order to actually handle the payment information returned by the PKPayment, you need to implement the PKPayment protocol. This has 2 required methods, -(void)payment and -(void)payment.
To understand how each of these components work, let’s check out a timeline of how an Apple Pay purchase works:
- You present a
PKPaymentas described above.Authorization View Controller - The customer approves the purchase using Touch ID (or, if that fails 3 times, by entering their passcode).
- The thumbprint icon turns into a spinner, with the label “Processing”
- Your delegate receives the
paymentcallback.Authorization View Controller:did Authorize Payment:completion: - Your application communicates asynchronously with your payment processor and website backend to actually make a charge with those payment details. Once this complete, you invoke the
completionhandler that you’re given as a parameter with eitherPKPaymentorAuthorization Status.Success PKPaymentdepending on the result.Authorization Status.Failure - The
PKPaymentspinner animates into a success or failure icon. If successful, a notification will arrive from PassBook indicating a charge on the customer’s credit card.Authorization View Controller - Your delegate receives the
paymentcallback. It is then responsible for callingAuthorization View Controller Did Finish: dismissto dismiss the payment screen.View Controller Animated:completion

Concretely, this comes out looking like this:
// MARK: - PKPaymentHere, the process method is your own code, and would leverage your payment processor’s SDK to finish the charge.
Dynamic Shipping Methods and Pricing
If you’re using Apple Pay to let your customer buy physical goods, you might want to offer them different shipping options. You can do this by setting the shipping property on PKPayment. Then, you can respond to your customer’s selection by implementing the optional PKPayment method, payment. This method follows a similar pattern to the did method described above, where you’re allowed to do asynchronous work and then call a callback with an updated array of PKPayments that includes the customer’s desired shipping method. (Remember from earlier that PKShipping inherits from PKPayment? This is really helpful here!)
Here’s a modified version of our earlier example, implemented as a computed property on the view controller and helper function:
var paymentIn this example, the customer will get the option to choose either free or express shipping—and the price they’re quoted will adjust accordingly as they change their selection.
But wait, there’s more!
Instead of having to provide a bunch of flat-rate shipping options, you can let your customer choose their shipping address and then calculate shipping rates dynamically based on that. To do that, you’ll first need to set the required property on your PKPayment. This can represent any combination of PKAddress , .Phone, and .Postal.
Alternatively, if you don’t need the user’s full mailing address but need to collect some contact information (like an email address to send receipts to), this is a good way to do it.
When this field is set, a new “Shipping Address” row appears in the payment UI that allows the customer to choose one of their saved addresses. Every time they choose one, the (aptly named) payment message will be sent to your PKPayment.
Here, you should calculate the shipping rates for the selected address and then call the completion callback with 3 arguments:
- The result of the call
-
PKPaymentif successfulAuthorization Status.Success - ``PKPaymentAuthorizationStatus.
Failureif a connection error occurs -
.Invalidif the API returns an empty array (i.e. shipping to that address is impossible).Shipping Postal Address
-
- An array of
PKShippings representing the customer’s available shipping optionsMethod - A new array of
PKPayments that contains one of the shipping methodsSummary Item
I’ve set up a really simple web backend that queries the EasyPost API for shipping rates to a given address. The source is available at https://github.com/jflinter/example-shipping-api.
Here’s a function to query it, using Alamofire:
import AddressWith this, it’s simple to implement PKPayment:
func payment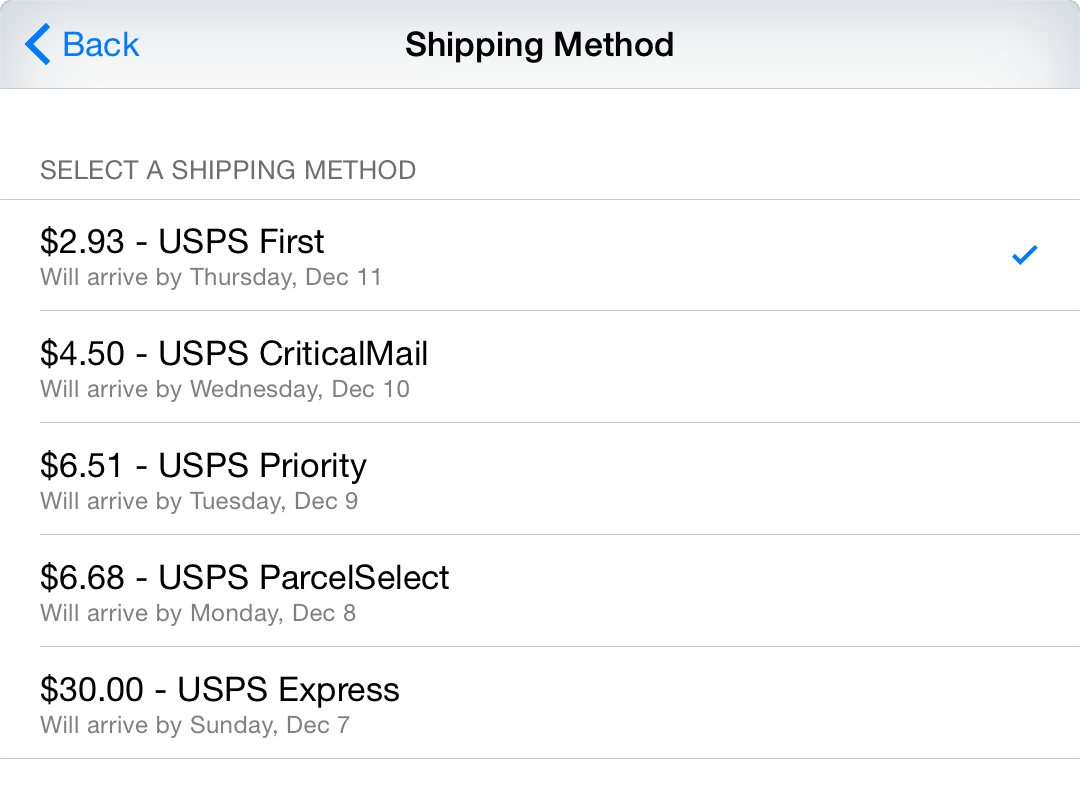
Now, the customer can select an address and receive a different set of shipping options depending on where they live. Both the shipping and shipping they ultimately select will be available as properties on the PKPayment that is given to your delegate in the payment method.
You can find all of the source code in this article at https://github.com/jflinter/ApplePayExample.
Even though Apple Pay only exposes a small number of public APIs, its possible applications are wide-ranging and you can customize your checkout flow to fit your app. It even enables you to build new types of flows, such as letting your customers buy stuff without having to create an account first.
As more apps start using Apple Pay (and as more customers own devices that support it), it’ll become a ubiquitous way of paying for things in iOS apps. I’m excited to hear what you build with Apple Pay— if you have any questions, or want to show anything off, please get in touch!