op run
.env files.
If you’ve worked on a web application,
you’ve probably seen one.
While they certainly get the job done,
.env files have shortcomings that can create friction in development workflows.
We’ve touched on .env files in past articles about
xcconfig files and
secret management on iOS.
But this week on NSHipster we’re taking a deeper look,
exploring how the lesser-known
1Password CLI (op)
can solve some problems many of us face managing secrets day-to-day.
The Problem of Configuration
Around 2011, Adam Wiggins published “The Twelve-Factor App”, a methodology for building modern web applications that has since become canon in our industry.
The third of those twelve factors, “Config”, prescribes storing configuration in environment variables:
“Apps sometimes store config as constants in the code. This is a violation of twelve-factor, which requires strict separation of config from code. Config varies substantially across deploys, code does not.”
This core insight — that configuration should be separate from code —
led to the widespread adoption of .env files.
A typical .env file looks something like this:
DATABASE_URL=postgres://localhost:5432/myapp_development
REDIS_URL=redis://localhost:6379/0
AWS_ACCESS_KEY_ID=AKIA...
AWS_SECRET_ACCESS_KEY=wYou add this file to .gitignore to keep it out of version control,
and load these variables into your environment at runtime with a tool or library.
Simple enough. So what’s the problem?
.env Files in Practice
Despite their apparent simplicity,
.env files introduce several points of friction in development workflows:
First, there’s the perennial issue of onboarding:
How does a new team member get what they need to run the app locally?
The common solution is to have a .env.sample / .env.example file in version control,
but this creates a maintenance burden to keep it in sync with the actual requirements.
And in any case,
developers still need to go on a scavenger hunt to fill it out
before they can be productive.
Then there’s the multi-environment problem:
As soon as you need different configurations for development, staging, and production,
you end up with a proliferation of files:
.env.development, .env.test, .env.staging…
Each requiring its own .sample / .example counterpart.
But perhaps most pernicious is the challenge of managing changes to configuration over time.
Because .env files aren’t in version control,
changes aren’t, you know… tracked anywhere 🥲
Enter the 1Password CLI (op)
You may already use 1Password to manage your passwords and other secrets. But what you might not know is that 1Password also has a CLI that can integrate directly with your development workflow.
op lets you manage 1Password from the command-line.
You can do all the
CRUD
operations you’d expect for items in your vault.
But its killer features is the op run subcommand,
which can dynamically inject secrets from your 1Password vault
into your application’s environment.
Instead of storing sensitive values directly in your .env file,
you reference them using special op:// URLs:
# .env
IRC_USERNAME=op://development/chatroom/username
IRC_PASSWORD=op://development/chatroom/password
import Foundation
guard let username = ProcessRun this on its own, and you’ll fail in proper 12 Factor fashion:
$ swift run
❗️ "Missing required environment variables"
But by prepending op run
we read in that .env file,
resolve each vault item reference,
and injects those values into the evironment:
$ op run -- swift run
hunter2
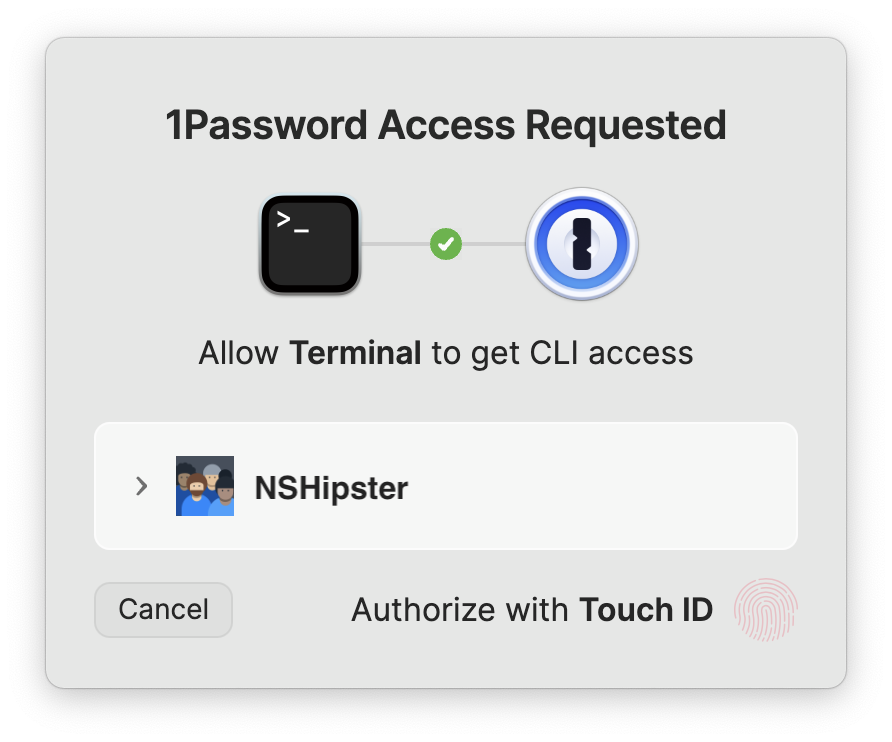
You’re even prompted to authorize with Touch ID the first time you invoke op run.

Ready to give this a test drive? Here’s how to get started:
A Step-By-Step Guide to Using the 1Password CLI in .env Files
Step 1: Install and Configure the 1Password CLI
On macOS, you can install the CLI with homebrew:
$ brew install 1password-cli
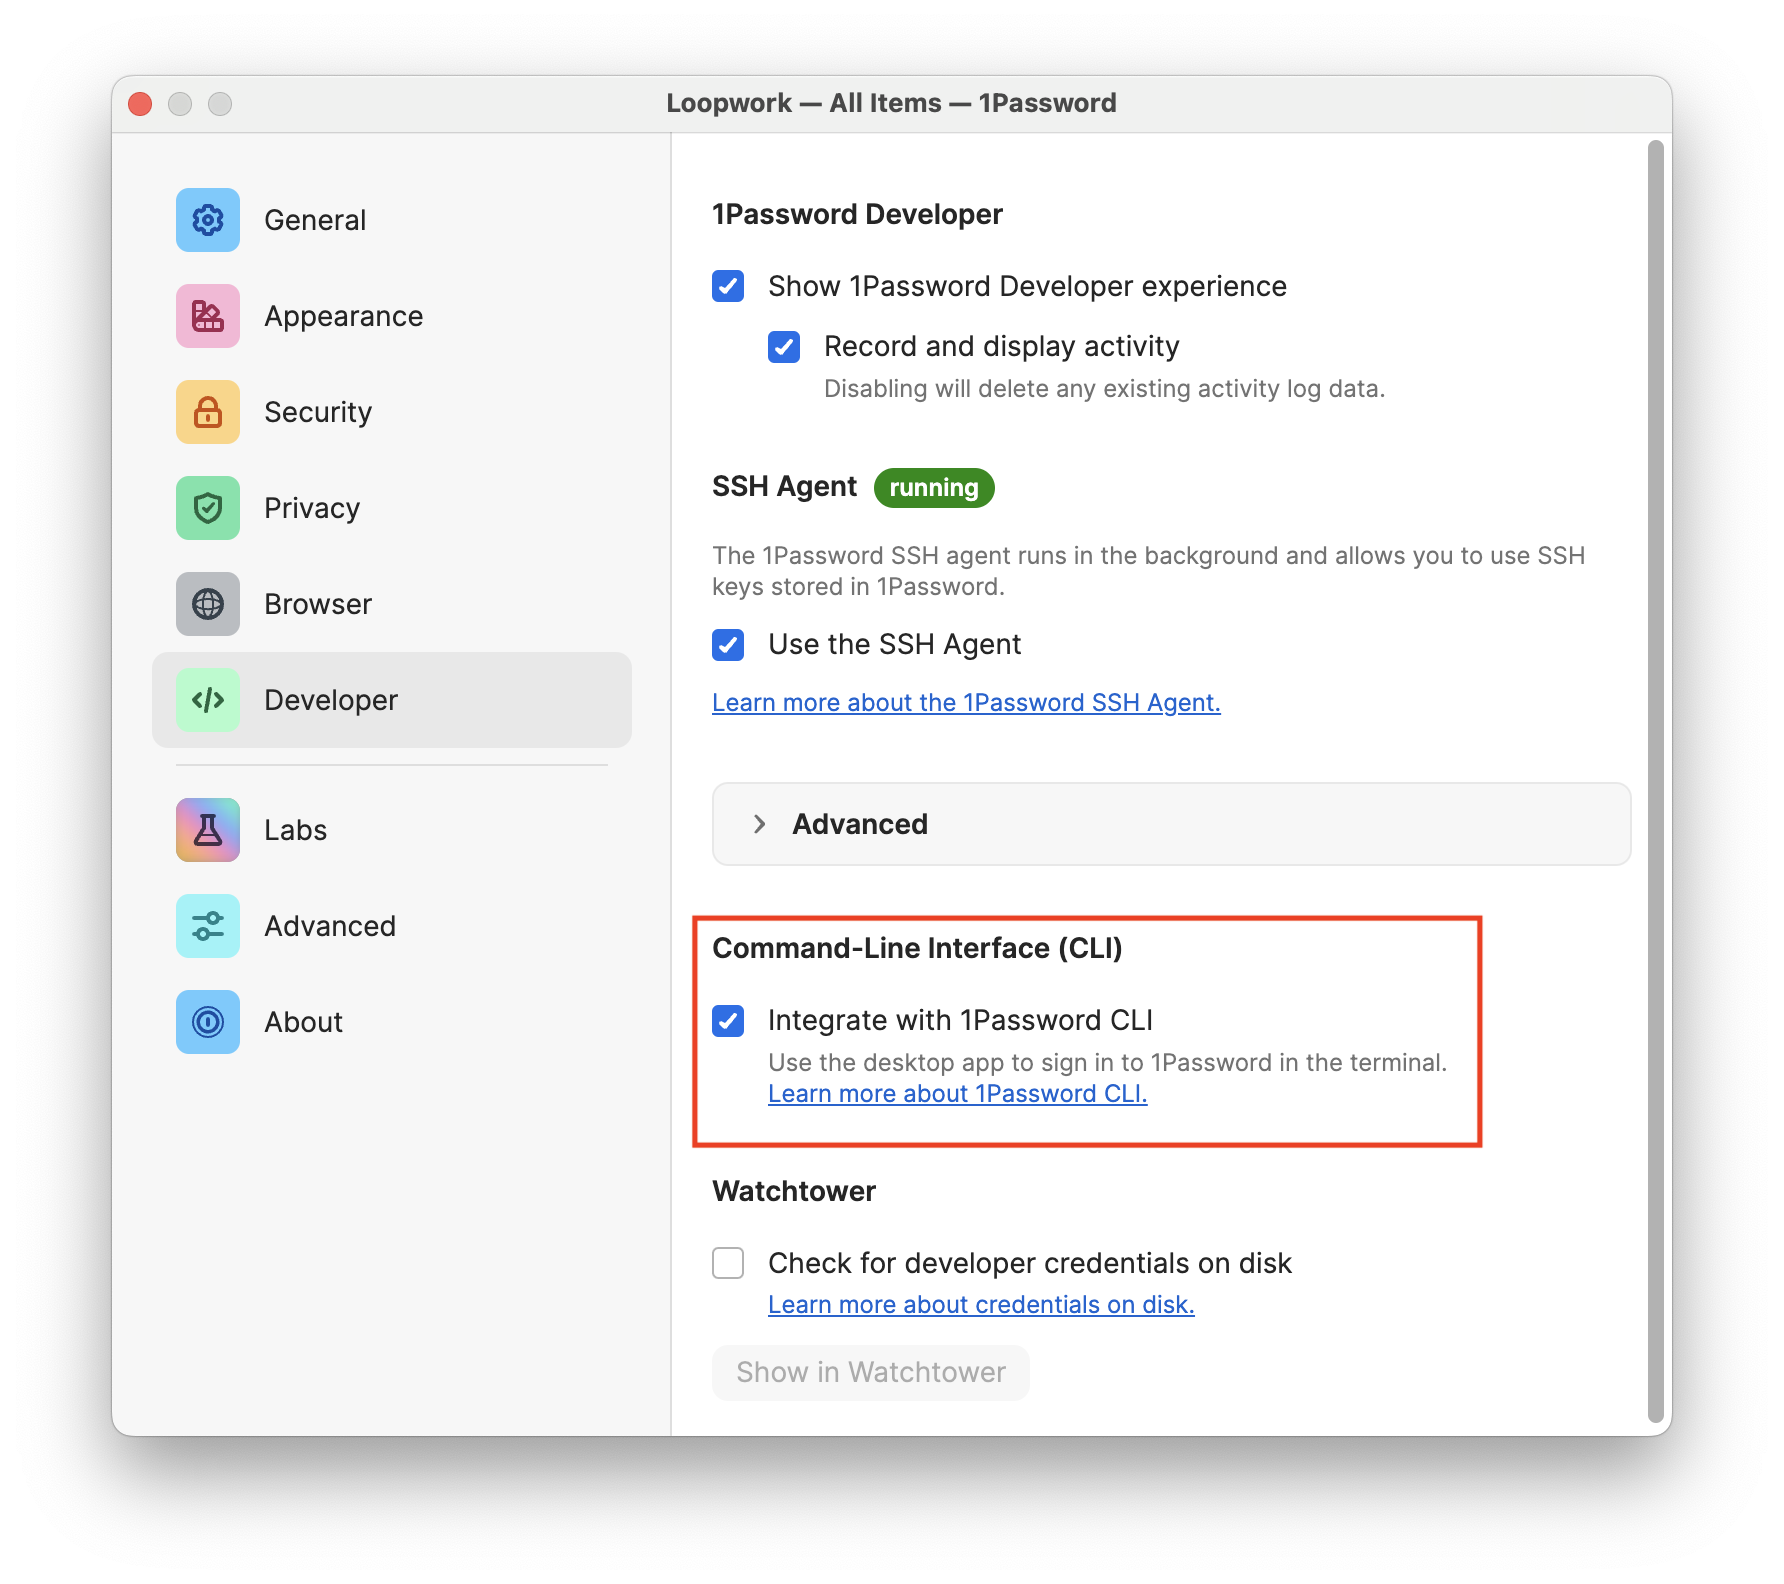
Then, in the 1Password app, open Settings (⌘,), go to the Developer section, and check the box labeled “Integrate with 1Password CLI”.

Running any op subcommand should prompt you to connect to the app.
If you get off the happy path, consult the official docs to get back on track.
Step 2: Create a Shared Vault
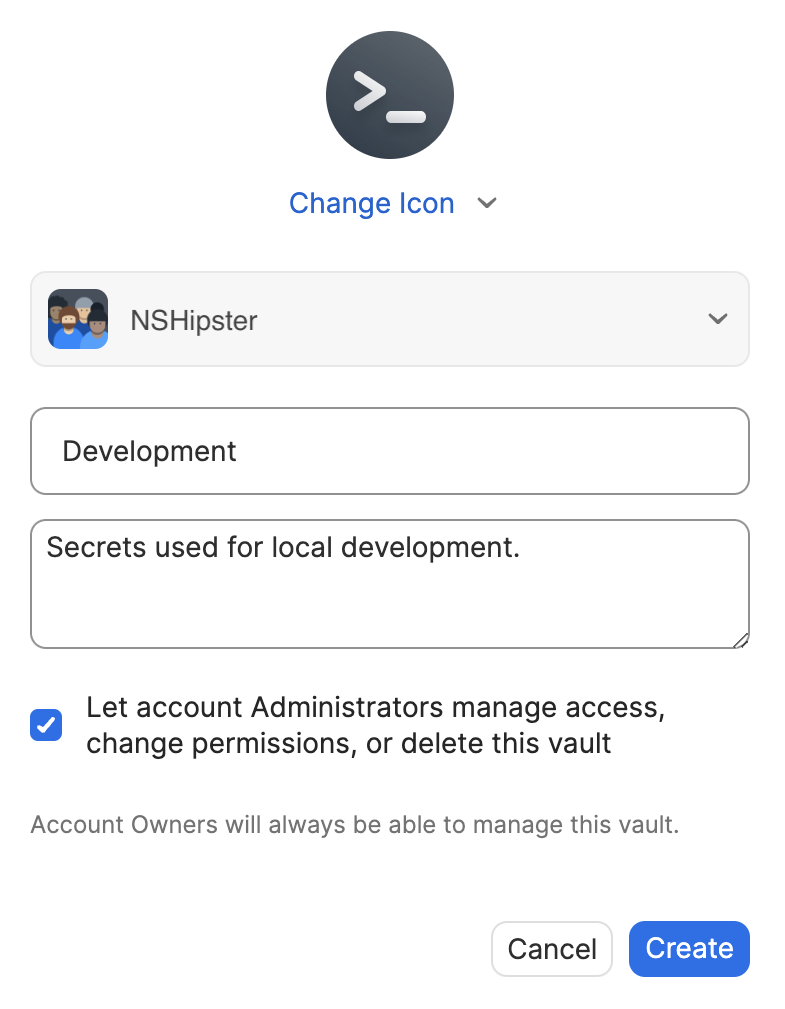
Create a new vault in 1Password specifically for development secrets. Give it a clear name like “Development” and a useful description.

Step 3: Migrate Existing Secrets
For each entry in your .env file,
create a corresponding item in 1Password.
Choose the appropriate item type:


Step 4: Update Your .env File
Replace raw values in your .env file
with op:// references using the following format:
op://vault/item/field
Each reference consists of three components:
- The vault name (e.g., “development”)
- The item name or UUID
- The field name from the item
For example, here’s how you might reference credentials for various services:
# Reference by item name (case-insensitive)
AWS_ACCESS_KEY_ID=op://development/AWS/username
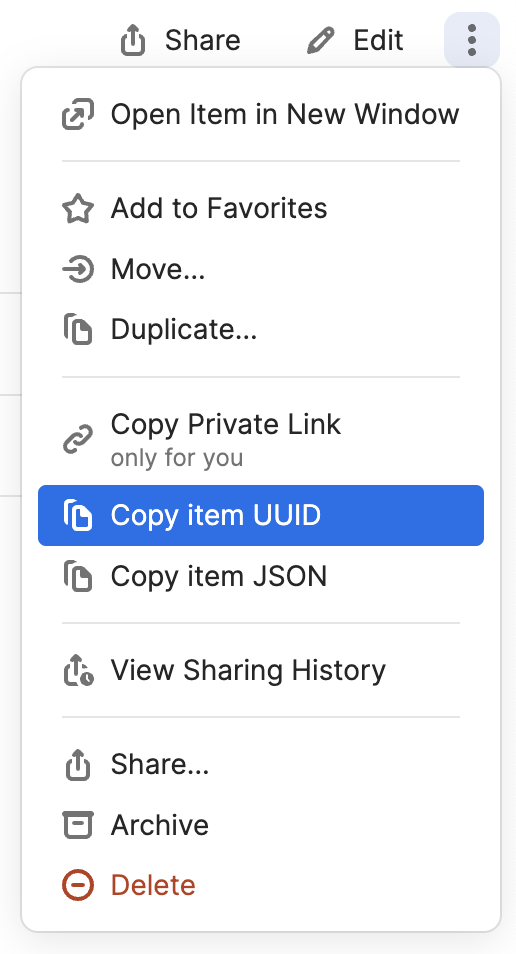
AWS_SECRET_ACCESS_KEY=op://development/WorkYou can locate the UUID for any item in 1Password by clicking the "More actions" button (⋮, whatever you want to call that) and selecting "Copy item UUID".
Both item name and UUID references work, but using UUIDs can be more reliable in automation contexts since they're guaranteed to be unique and won't change if you rename the item.

Once you’ve replaced all sensitive values with op:// references,
you can safely commit your .env file to version control.
The references themselves don’t contain any sensitive information –
they’re just pointers to your 1Password vault.
Step 5. Update Your Development Script
Whatever command you normally run to kick off your development server,
you’ll need to prepend op run -- to that.
For example, if you follow the
“Scripts to Rule Them All” pattern,
you’d update script/start like so:
#!/bin/sh

- swift run
+ op run -- swift run
Advantages Over Traditional .env Files
op run solves many of the problems inherent to .env files:
-
No More Cold Start Woes: New team members get access to all required configuration simply by joining the appropriate 1Password vault.
-
Automatic Updates: When credentials change, they’re automatically updated for everyone on the team. No more out-of-sync configuration.
-
Proper Secret Management: 1Password provides features like access controls, versioning, and integration with Have I Been Pwned.
Potential Gotchas
Like any technical solution, there are some trade-offs to consider:
-
Performance:
op runadds a small overhead to command startup time (typically less than a second). 1 -
stdout/stderr Handling: As mentioned above,
op runmodifiesstdout/stderrto implement secret masking, which can interfere with some terminal applications. 2 -
Dev Container Support: If you use VSCode Dev Containers, you may encounter some friction with the 1Password CLI. 3
Driving Technical Change
The implementation is often the easy part. The real challenge can be getting your team on board with the change.
First, state the problem you’re trying to solve. Change for change’s sake is rarely helpful.
Next, figure out who you need to get buy-in from. Talk to them. Articulate specific pain point that everyone recognizes, like the frustration of onboarding new team members or the time wasted debugging configuration-related issues.
Once you’ve gotten the green light, move slowly but deliberately. Start small by migrating a single credential, or maybe all of the credentials in a smaller project. Build up confidence that this approach is a good fit — both technically and socially.
Managing development secrets is one of those problems that seems trivial at first but can become a significant source of friction as your team and application grow.
The 1Password CLI offers a more sophisticated approach that integrates with tools developers already use and trust.
While it may not be the right solution for every team,
it’s worth considering if you’re feeling the pain of traditional .env files.