MapKit JS
Announced in 2018, MapKit JS takes the convenient cartographic capabilities of the MapKit framework on iOS and macOS, and brings them to the web.
MapKit JS — along with MusicKit JS — usher in a new generation of web APIs from Apple, that’s defined by a brand new authentication flow based on JSON Web Tokens (JWT). These APIs also come at a time when Swift on the Server is just starting to hit its stride, making the browser-based offering all the more exciting.
This week on NSHipster, we’ll zoom out and give turn-by-turn directions of how to start your journey with MapKit JS. (Once we figure out where we lost our keys) on our way to a working integration.
Setting Up MapKit JS
To use MapKit JS on the web, you’ll need an Apple Developer account. Using that account, you may obtain credentials for issuing tokens that can be used to request map tiles, directions, and other mapping APIs.
You create and manage MapKit JS keys from your Apple Developer Account Dashboard. (The process should be familiar to anyone who’s set up push notifications for their iOS app before.)
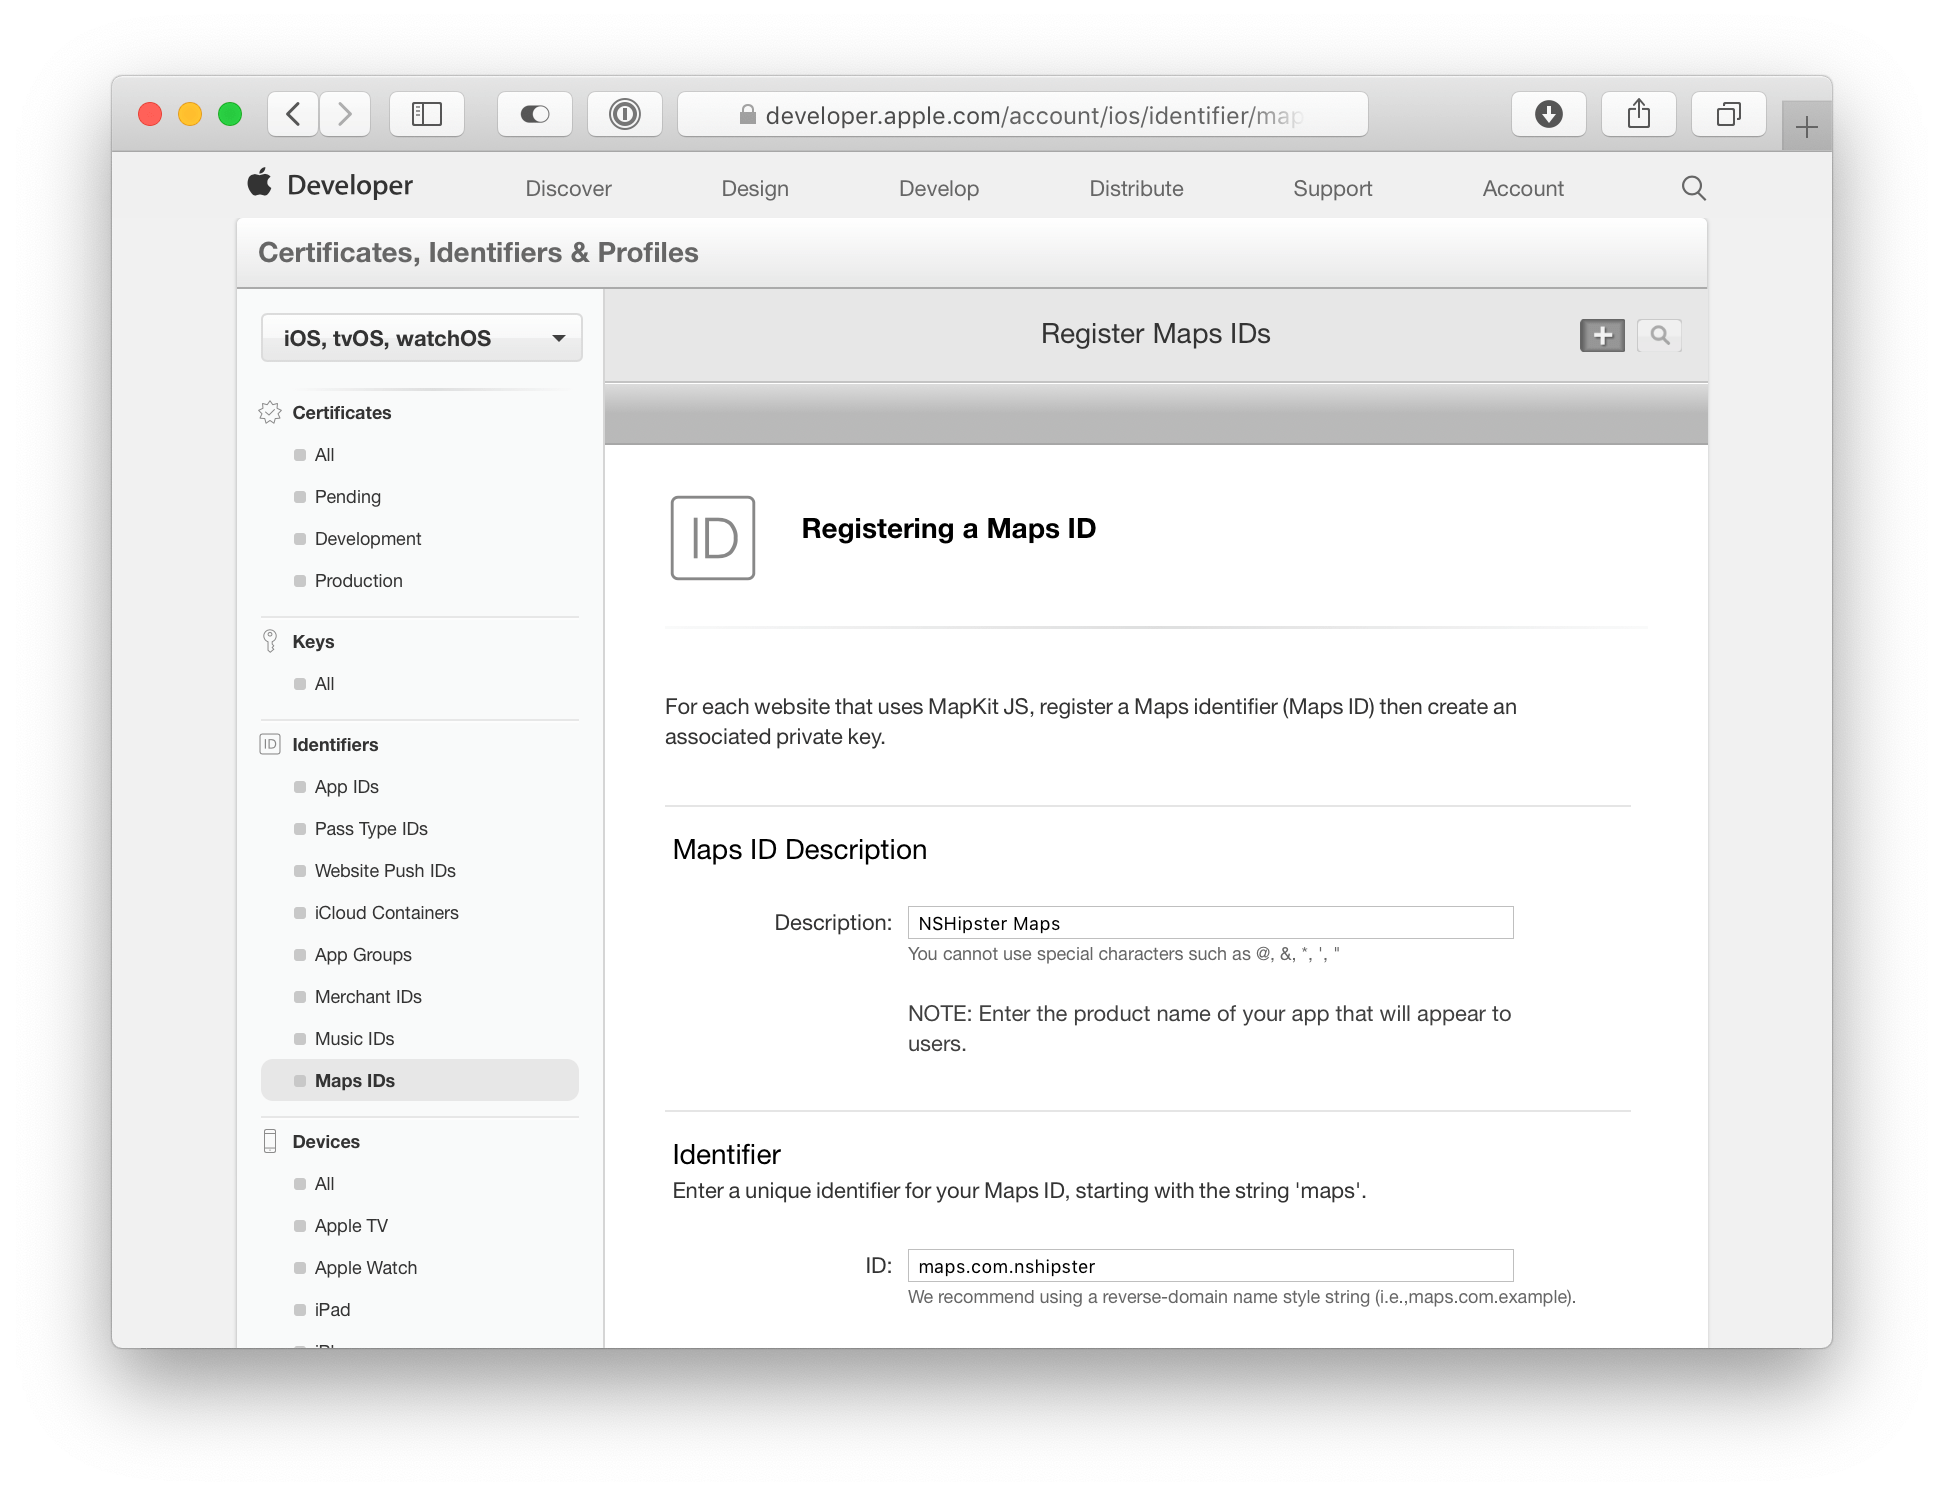
Step 1: Register a Maps ID
On the “Certificates, Identifiers & Profiles” page,
navigate to the Maps IDs section,
which is listed in the sidebar under the “Identifiers” heading.
Click the + button
and fill out the form,
providing a Maps ID description and
a unique, reverse-domain identifier
(such as maps.com.nshipster).
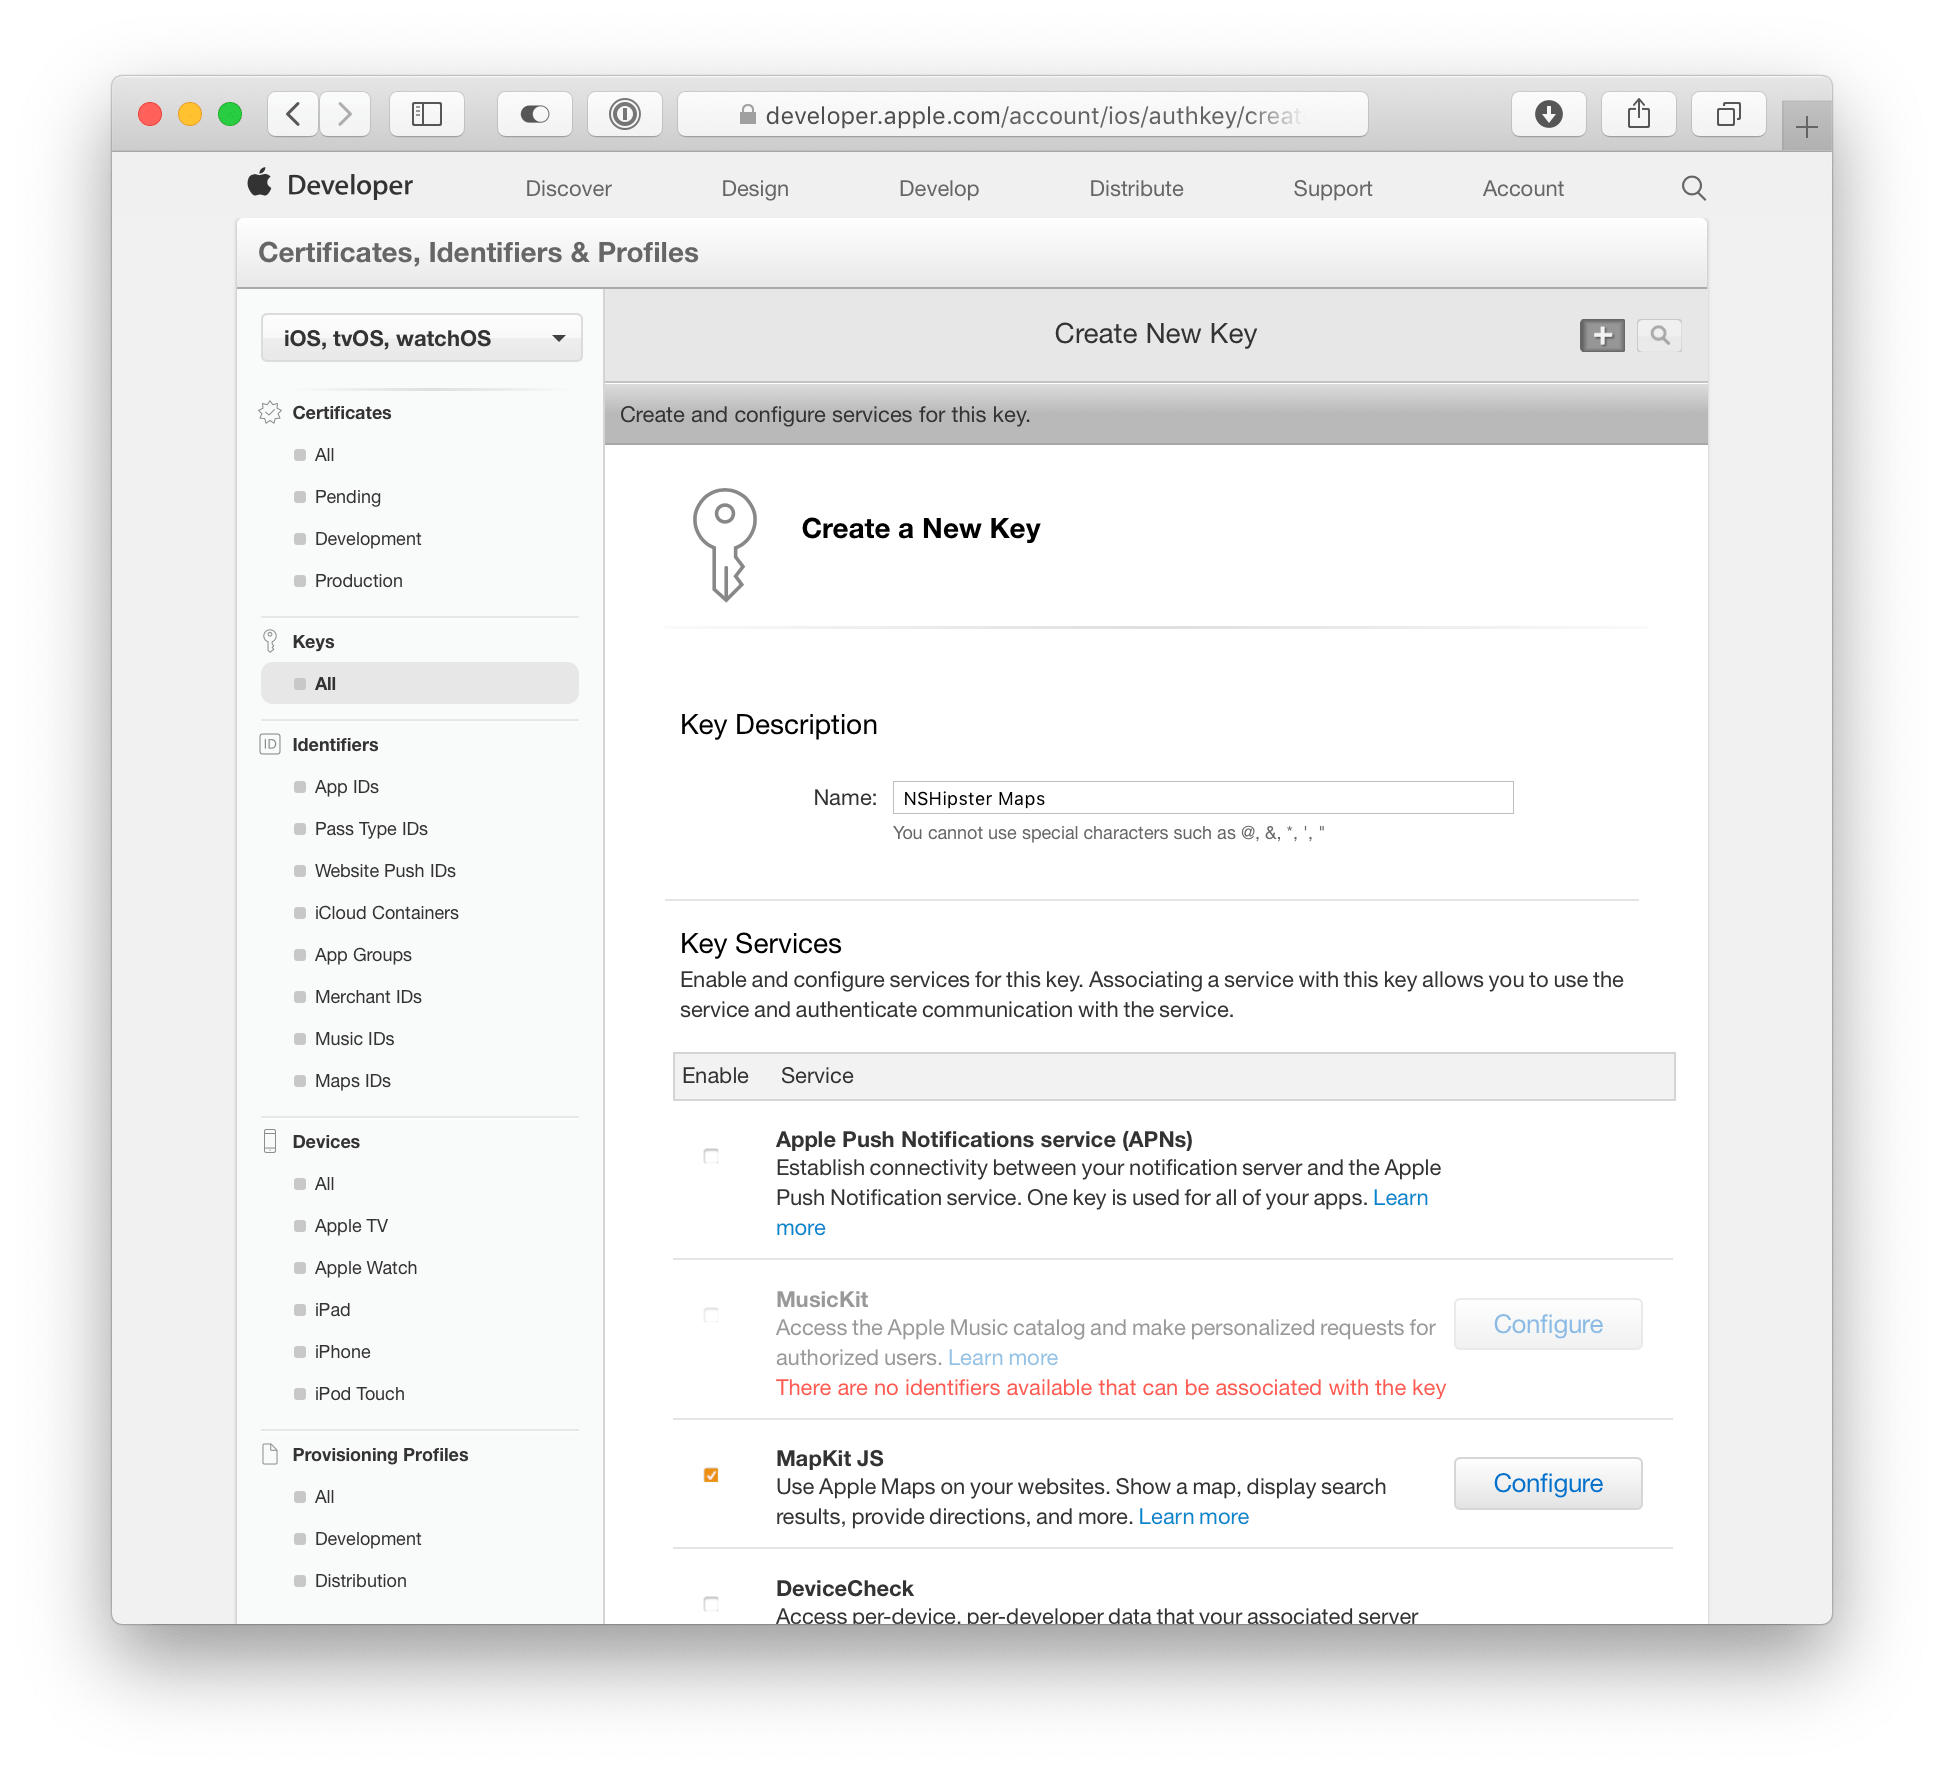
Step 2: Create a New MapKit JS Key
Next, go to the all keys page found in the sidebar under the “Keys” heading. Again, click the + button and proceed to fill out the form, selecting the checkbox that enable MapKit JS key services and configuring it to use the Maps ID created in the previous step.
Step 3: Download the Key
Finally, go back to the all keys page, click on the key you just created, and click the Download button.

At this point,
you should now have a file named something like Auth
sitting in your Downloads folder.
“But what is a .p8 file?”, you might ask.
Well, the truth is…
P8, PEM, ASN.1
.p8 is a made-up file extension;
the Auth file you downloaded
is a text file like any other.
If you open it up,
you can see that it is, indeed, text:
-----BEGIN PRIVATE KEY-----
MIGTAgThe convention of delimiting text-encoded binary data
with -----BEGIN THING----- and -----END THING-----
is known as PEM format,
which is named after
Privacy-Enhanced Mail.
The text sandwiched between those delimiters
is the Base64-encoding of the private key,
represented in ASN.1.
At this point, you may feel like you took a wrong turn and drove right into an ocean of acronyms. This wouldn’t be surprising, as drowning in alphabet soup is an occupational hazard of the software development profession — especially when it comes to matters cryptographic.
But worry not!
You can make it back to shore just by treading water.
All you need to know at this point
is that you’ll use the private key in the .p8 file
to let Apple know that our requests for map data are coming from us.
JSON Web Tokens
JSON Web Tokens (JWT) are a way for claims to be securely communicated between two parties They’re an open standard, codified by RFC 7519.
A JSON Web Token has three distinct parts
consisting of Base64-encoded segments
joined by a period (.).
- The first segment represents the header, which distinguishes the token type, and information needed to verify the identity of the signer.
- The second segment is the payload, which contains one of more claims to be transmitted between two parties.
- The third segment is the signature, which can be cryptographically verified using the contents of the message and one or more keys.
JSON web tokens can be daunting when seen up close, but the structure makes more sense when you see it visually:
Encoded Form Base-64 Encoded JSON
eyHeader Algorithm and Token Type
{
  "typ": "JWT",
  "alg": "ES256",
  "kid": "4T92YZSWGM"
}
Payload Data
{
  "iss": "9JWVADR3RQ",
  "exp": 1552393165.925637,
  "iat": 1552306765.925637
}
Signature Verification of Identity
ECDSASHA256(
base64UrlApple Maps JS requires claims for
the issuer (iss),
the date of issuing (iat),
and the expiration date (exp);
you may optionally specify an origin
to restrict which hosts are allowed to make requests.
To verify that claims are made by who they claim to be,
tokens are signed and encrypted using the
ES256 algorithm.
Signing MapKit JS Tokens
To sign a JWT token for MapKit JS, we’ll need the following 3 pieces of information:
- A private key provided by Apple
- The ID of the private key
- The ID of the team that owns the private key
Once you have all of that, it’s simply a matter of creating a JWT Header), creating a JWT claims object, and signing it using the ES256 algorithm.
import Foundation
import SwiftAlthough you could generate a single API key that doesn’t expire, that opens your account to abuse from those who might take advantage of these generous terms. Here, a “principle of least privilege” is generally preferred; instead of issuing one immortal token, issue tokens that expire after a short period of time, and require clients to request new ones as necessary.
Of course, in order for this to work, we need to keep the private key secret from the client. To do that, we’ll store it on a server and mediate access by way of responses to token requests.
Serving Tokens with a Web Application
Here’s a simple web application using the Vapor framework.
When a GET request is made to the host root (/),
a static HTML page is served that displays a map.
The code that generates the map, in turn,
sends a GET request to the /token endpoint
to get a JWT in plaintext
that it can use to initialize MapKit JS.
Below, the implementation of the generate function
is essentially what we had in the previous code listing.
import Vapor
import SwiftInitializing MapKit in JavaScript
Finally, let’s complete le grand tour with a peek at what’s going on in our client-side JavaScript file:
mapkit.init({
authorizationBefore we can request map tiles,
we need to have Apple’s servers give us the OK.
We do this by calling the init method,
which takes an authorization;
the function takes a single closure parameter,
which is called asynchronously when the token is received
by the fetch request.
Alternatively,
if what you’re making is unlikely to leak outside of your localhost,
you could certainly take a short cut and hard-code a long-lived token.
Instead of waiting for a fetch to finish,
you simply call the done function straight away:
const token = "...";
mapkit.init({
authorizationAt Last, a Map!
Now that we’ve gone through all of that trouble to get map tiles hooked up for our website, let’s do a quick drive-by of the actual MapKit API:
MapKit JS should be familiar to anyone familiar with the original MapKit framework on iOS and macOS. For example, when you initialize a map, you can configure its initial view by constructing a region from a fixed distance around center point.
const center = new mapkit.Coordinate(37.3327, -122.0053),
span = new mapkit.CoordinateAnnotations work much the same,
except with arguably nicer affordances out of the box.
For example,
mapkit.Marker offers the same, familiar pushpin shape
that we iOS developers have always wanted —
with simple, power knobs for customization.
const annotation = new mapkit.Marker<div id="map"></div>
<script src="https://cdn.apple-mapkit.com/mk/5.x.x/mapkit.js"></script>
<script async="async" integrity="sha512-dde+psWith only a few lines of JavaScript and HTML, we can embed a beautiful little map into our webpages using MapKit JS.
MapKit JS joins a robust ecosystem of mapping providers. Currently in beta, it offers 250,000 map initializations and 25,000 service requests for free per day (!), which is quite generous — especially when compared to similar offerings from Google and MapBox.
So if you’ve been kicking around an idea for a map widget to add to your site or a directions feature for your web app, you might want to give MapKit JS a look!