Swift Documentation
Code structure and organization is a matter of pride for developers. Clear and consistent code signifies clear and consistent thought. Even though the compiler lacks a discerning palate when it comes to naming, whitespace, or documentation, it makes all the difference for human collaborators.
This week, we’ll be documenting the here and now of documentation in Swift.
Since the early ’00s, Headerdoc has been Apple’s preferred documentation standard. Starting off as little more than a Perl script that parsed trumped-up Javadoc comments, Headerdoc would eventually be the engine behind Apple’s developer documentation online and in Xcode.
But like so much of the Apple developer ecosystem, Swift changed everything. In the spirit of “Out with the old, in with the new”, Xcode 7 traded Headerdoc for fan favorite Markdown — specifically, Swift-flavored Markdown.
Documentation Comments & Swift-Flavored Markdown
Even if you’ve never written a line of Markdown before, you can get up to speed in just a few minutes. Here’s pretty much everything you need to know:
Basic Markup
Documentation comments look like normal comments,
but with a little something extra.
Single-line documentation comments have three slashes (///).
Multi-line documentation comments
have an extra star in their opening delimiter (/** ... */).
Standard Markdown rules apply inside documentation comments:
- Paragraphs are separated by blank lines.
- Unordered lists are marked by bullet characters
(
-,+,*, or•). - Ordered lists use numerals (1, 2, 3, …)
followed by either
a period (
1.) or a right parenthesis (1)). - Headers are preceded by
#signs or underlined with=or-. - Both links and images work, with web-based images pulled down and displayed directly in Xcode.
/**
    # Lists

    You can apply *italic*, **bold**, or `code` inline styles.

    ## Unordered Lists

    - Lists are great,
    - but perhaps don't nest;
    - Sub-list formatting...

      - ...isn't the best.

    ## Ordered Lists

    1. Ordered lists, too,
    2. for things that are sorted;
    3. Arabic numerals
    4. are the only kind supported.
*/
Summary & Description
The leading paragraph of a documentation comment becomes the documentation Summary. Any additional content is grouped together into the Discussion section.
Parameters & Return Values
Xcode recognizes a few special fields
and makes them separate from a symbol’s description.
The parameters, return value, and throws sections
are broken out in the Quick Help popover and inspector
when styled as a bulleted item followed by a colon (:).
-
Parameters:
Start the line with
Parameter <param name>:and the description of the parameter. -
Return values:
Start the line with
Returns:and information about the return value. -
Thrown errors:
Start the line with
Throws:and a description of the errors that can be thrown. Since Swift doesn’t type-check thrown errors beyondErrorconformance, it’s especially important to document errors properly.
/**
Creates a personalized greeting for a recipient.
- Parameter recipient: The person being greeted.
- Throws: `MyAre you documenting a function whose method signature
has more arguments than a Hacker News thread about tabs vs. spaces?
Break out your parameters into a bulleted list
underneath a Parameters: callout:
/// Returns the magnitude of a vector in three dimensions
/// from the given components.
///
/// - Parameters:
///     - x: The *x* component of the vector.
///     - y: The *y* component of the vector.
///     - z: The *z* component of the vector.
func magnitude3D(x: Double, y: Double, z: Double) -> Double {
    return sqrt(pow(x, 2) + pow(y, 2) + pow(z, 2))
}
Additional Fields
In addition to Parameters, Throws and Returns,
Swift-flavored Markdown
defines a handful of other fields,
which can be loosely organized in the following way:
- Algorithm/Safety Information
PreconditionPostconditionRequiresInvariantComplexityImportantWarning- Metadata
AuthorAuthorsCopyrightDateSeeAlso SinceVersion- General Notes & Exhortations
AttentionBugExperimentNoteRemarkToDo
Each of these fields is rendered in Quick Help as a bold header followed by a block of text:
Field Header:
The text of the subfield is displayed starting on the next line.
Code blocks
Demonstrate the proper usage or implementation details of a function by embedding code blocks. Inset code blocks by at least four spaces:
/**
The area of the `Shape` instance.
Computation depends on the shape of the instance.
For a triangle, `area` is equivalent to:
let height = triangle.calculateFenced code blocks are also recognized,
delimited by either three backticks (`) or tildes (~):
/**
    The perimeter of the `Shape` instance.

    Computation depends on the shape of the instance, and is
    equivalent to:

    ~~~
    // Circles:
    let perimeter = circle.radius * 2 * Float.pi

    // Other shapes:
    let perimeter = shape.sides.map { $0.length }
                               .reduce(0, +)
    ~~~
*/
var perimeter: CGFloat { get }
Documentation Is My New Bicycle
How does this look when applied to an entire class? Quite nice, actually!
/// 🚲 A two-wheeled, human-powered mode of transportation.
class Bicycle {
/// Frame and construction style.
enum Style {
/// A style for streets or trails.
case road
/// A style for long journeys.
case touring
/// A style for casual trips around town.
case cruiser
/// A style for general-purpose transportation.
case hybrid
}
/// Mechanism for converting pedal power into motion.
enum Gearing {
/// A single, fixed gear.
case fixed
/// A variable-speed, disengageable gear.
case freewheel(speeds: Int)
}
/// Hardware used for steering.
enum Handlebar {
/// A casual handlebar.
case riser
/// An upright handlebar.
case café
/// A classic handlebar.
case drop
/// A powerful handlebar.
case bullhorn
}
/// The style of the bicycle.
let style: Style
/// The gearing of the bicycle.
let gearing: Gearing
/// The handlebar of the bicycle.
let handlebar: Handlebar
/// The size of the frame, in centimeters.
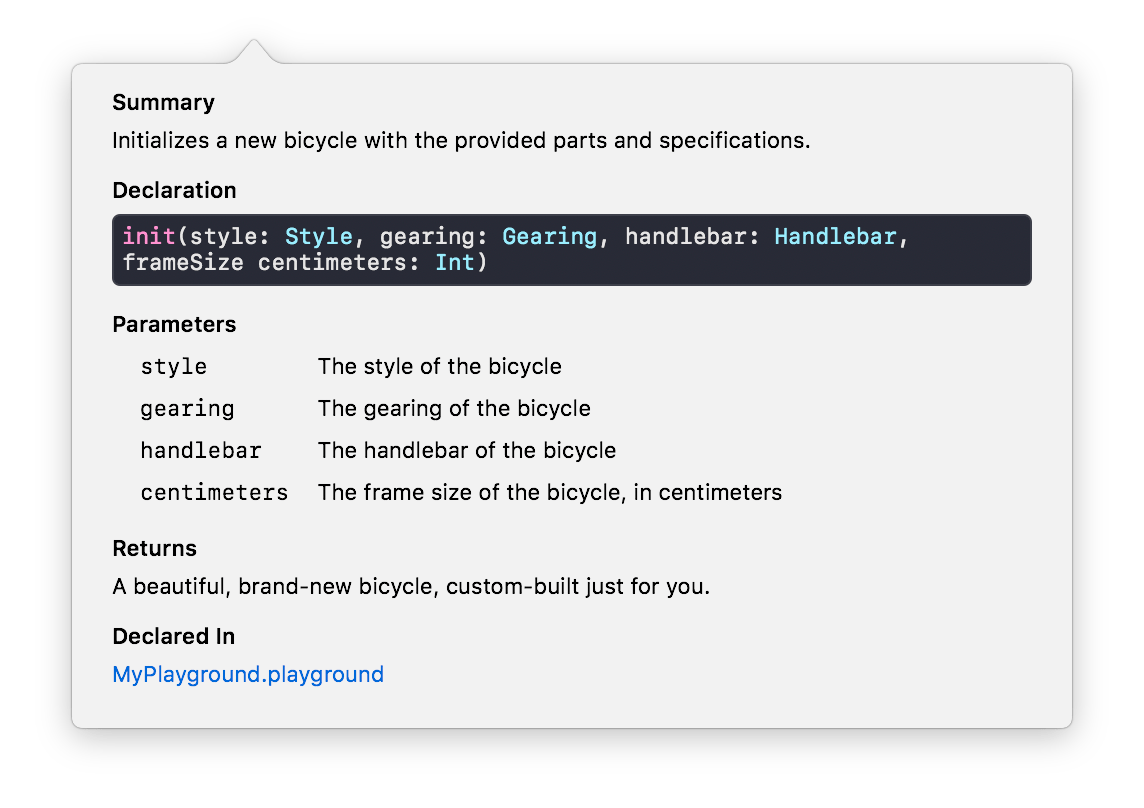
let frameOption-click on the initializer declaration, and the description renders beautifully with a bulleted list:

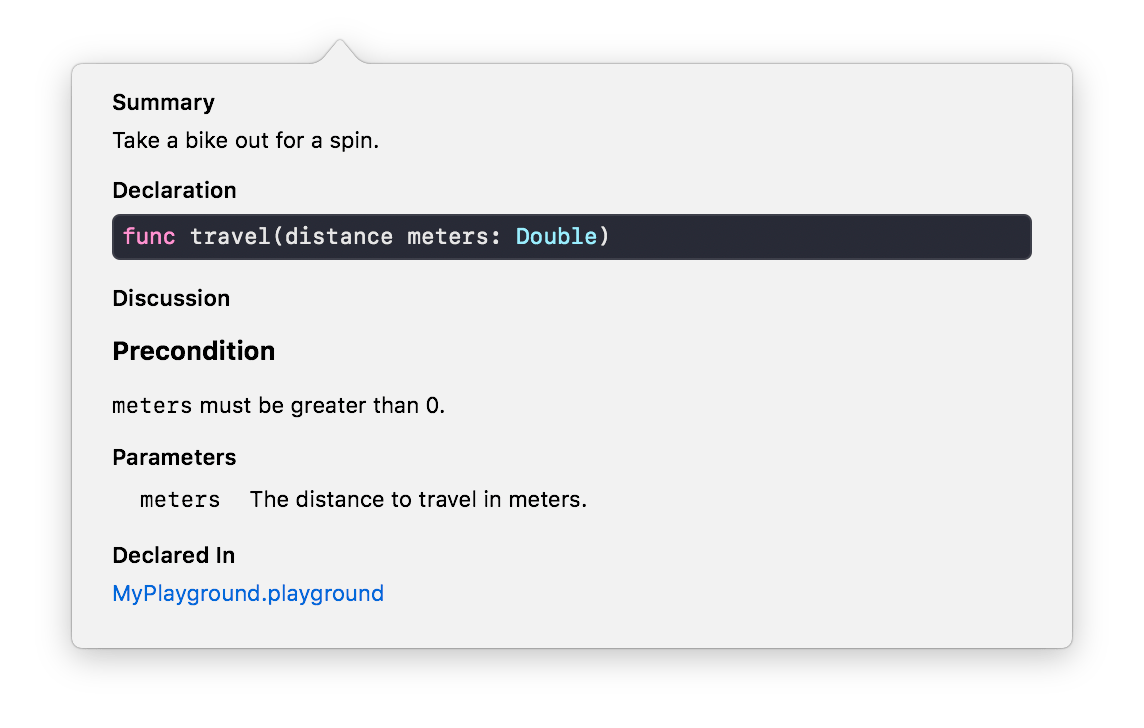
Open Quick Documentation for the method travel,
and the parameter is parsed out into a separate field,
as expected:

MARK / TODO / FIXME
In Objective-C,
the preprocessor directive #pragma mark
is used to divide functionality into meaningful, easy-to-navigate sections.
In Swift, the same can be accomplished with the comment // MARK:.
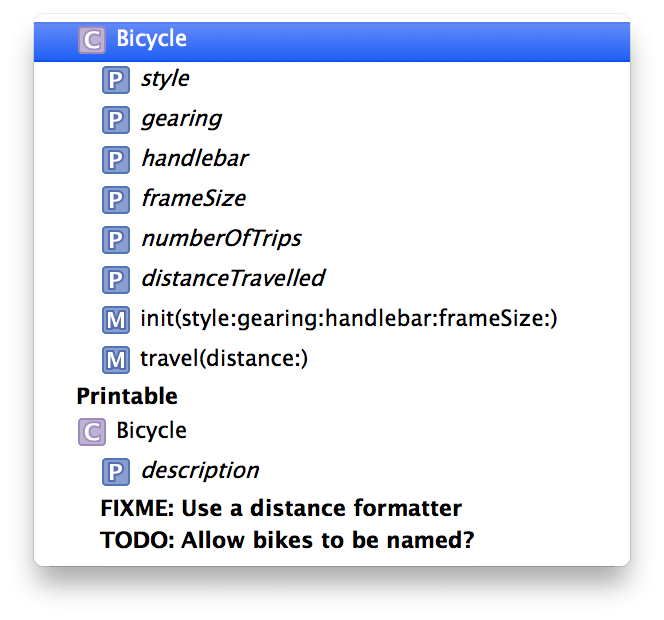
The following comments are surfaced in the Xcode source navigator:
// MARK:// TODO:// FIXME:
Other conventional comment tags,
such as NOTE and XXX aren’t recognized by Xcode.
To show these new tags in action,
here’s how the Bicycle class could be extended to adopt
the Custom protocol,
and implement the description property.

// MARK: - CustomBringing everything together in code:
var bike = Bicycle(style: .road,
gearing: .freewheel(speeds: 8),
handlebar: .drop,
frameAt the time of writing, there’s no official tool for transforming documentation comments into something more tangible than Quick Help panels in Xcode,
Fortunately, where necessity arises, open source (often) delivers.
Jazzy
Jazzy is a terrific open-source command-line utility that transforms your project’s documentation comments into a set of Apple-like HTML documentation (but that nice vintage style, before that whole redesign). Jazzy uses Xcode’s SourceKitService to read your beautifully written type and method descriptions.
Install Jazzy as a gem, then run from the root of your project folder to generate documentation.
$ gem install jazzy
$ jazzy
Running xcodebuild
Parsing ...
building site
jam out ♪♫ to your fresh new docs in `docs`
Take a peek
at a Jazzy-generated documentation for the Bicycle class.
Although the tooling and documentation around Swift is still developing,
one would be wise to adopt good habits early,
by using the new Markdown capabilities for documentation,
as well as MARK: comments in Swift code going forward.
Go ahead and add it to your TODO: list.