UIActivityViewController
On iOS,
UIActivity provides a unified interface for users to
share and perform actions on strings, images, URLs,
and other items within an app.
You create a UIActivity
by passing in the items you want to share
and any custom activities you want to support
(we’ll show how to do that later on).
You then present that view controller as you would any other modal or popover.
let string = "Hello, world!"
let url = URL(string: "https://nshipster.com")!
let image = UIImage(named: "mustache.jpg")
let pdf = Bundle.main.url(forWhen you run this code the following is presented on the screen:
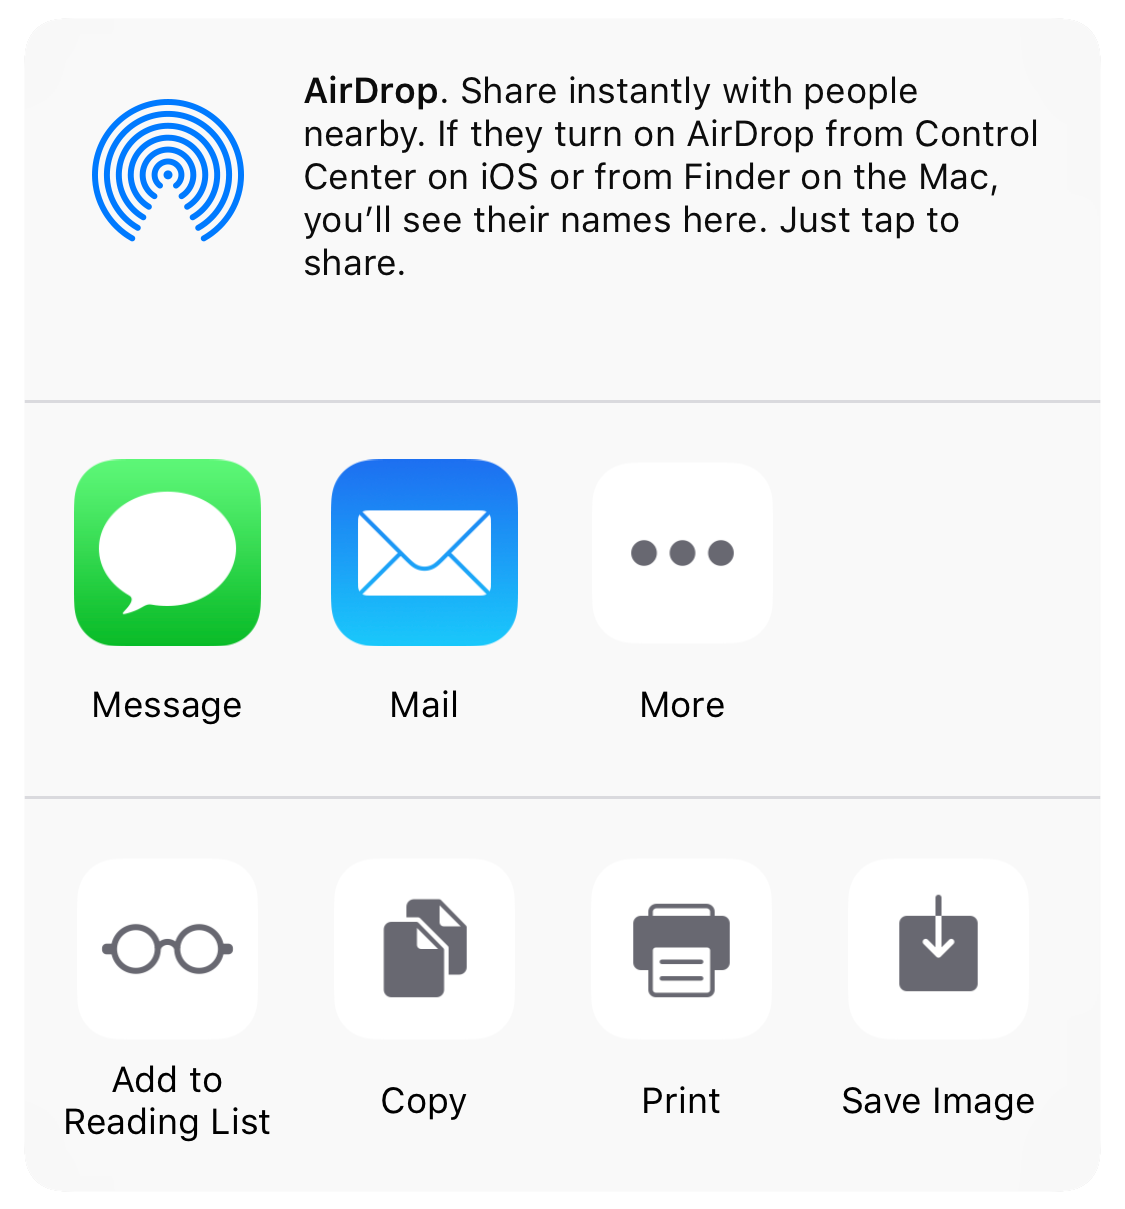
By default,
UIActivity shows all the activities available
for the items provided,
but you can exclude certain activity types
via the excluded property.
activityActivity types are divided up into “action” and “share” types:
-
Action (
UIActivity) activity items take an action on selected content, such as copying text to the pasteboard or printing an image.Category Action -
Share (
UIActivity) activity items share the selected content, such as composing a message containing a URL or posting an image to Twitter.Category Share
Each activity type supports certain kinds of items. For example, you can post a String, URL, and / or image to Twitter, but you can’t assign a string to be the photo for a contact.
The following tables show the available activity types for each category and their supported items:
UIActivityCategoryAction
| String | URL | Image | Files | ||
|---|---|---|---|---|---|
air |
✓ | ✓ | ✓ | ✓ | |
add |
✓ | ||||
assign |
✓ | ||||
copy |
✓ | ✓ | ✓ | ✓ | |
print |
✓ | ✓ | |||
save |
✓ | ✓ | |||
UIActivityCategoryShare
| String | URL | Image | Files | ||
|---|---|---|---|---|---|
mail |
✓ | ✓ | ✓ | ✓ | |
message |
✓ | ✓ | ✓ | ✓ | |
post |
✓ | ✓ | ✓ | ||
post |
✓ | ✓ | |||
post |
✓ | ✓ | ✓ | ||
post |
✓ | ✓ | ✓ | ||
post |
✓ | ✓ | |||
post |
✓ | ✓ | ✓ | ||
Creating a Custom UIActivity
In addition to the system-provided activities, you can create your own activities.
As an example, let’s create a custom activity that takes an image and applies a mustache to it via a web application.
 |
 |
| Before | After |
Defining a Custom Activity Type
First,
define a new activity type constant
in an extension to UIActivity.Activity,
initialized with a
reverse-DNS identifier.
extension UIActivity.ActivityCreating a UIActivity Subclass
Next,
create a subclass of UIActivity
and override the default implementations of the
activity type property
and activity, activity, and activity instance properties.
class MustachifyDetermining Which Items are Actionable
Activities are responsible for determining
whether they can act on a given array of items
by overriding the can method.
Our custom activity can work if any of the items is an image, which we identify with some fancy pattern matching on a for-in loop:
override func canPreparing for Action
Once an activity has determined that it can work with the specified items,
it uses the prepare(with
to get ready to perform the activity.
In the case of our custom activity, we take the PNG representation of the first image in the array of items and stores that in an instance variable:
var sourcePerforming the Activity
The perform() method is the most important part of your activity.
Because processing can take some time,
this is an asynchronous method.
However, for lack of a completion handler,
you signal that work is done by calling the activity method.
Our custom activity delegates the mustachification process to a web app
using a data task sent from the shared URLSession.
If all goes well, the mustachioed property is set
and activity is called with true
to indicate that the activity finished successfully.
If an error occurred in the request
or we can’t create an image from the provided data,
we call activity with false to indicate failure.
var mustachioedShowing the Results
The final step is to provide a view controller to be presented with the result of our activity.
The QuickLook framework provides a simple, built-in way to display images.
We’ll extend our activity to adopt QLPreview
and return an instance of QLPreview,
with self set as the data
for our override of theactivity method.
import QuickProviding a Custom Activity to Users
We can use our brand new mustache activity
by passing it to the application parameter
in the UIActivity:
let activity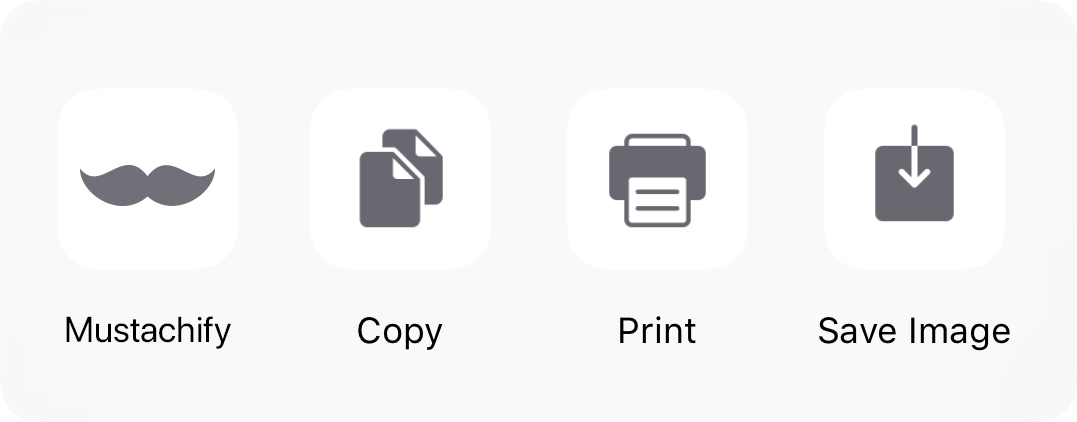
There is a strong argument to be made that
the long-term viability of iOS as a platform
depends on sharing mechanisms like UIActivity.
As the saying goes, “Information wants to be free.” Anything that stands in the way of federation is doomed to fail.