UISplitViewController
In the beginning, there was the iPhone. And it was good.
Some years later, the iPad was introduced. And with some adaptations, an iOS app could be made Universal to accommodate both the iPhone and iPad in a single bundle.
For a while,
the split between the two was the split itself —
namely UISplit.
Given a classic master-detail view controller paradigm,
an iPhone would display each on separate screens,
whereas an iPad would display both side-by-side.
But over time, the iPhone grew in size and the distinction between phone and tablet began to blur. Starting with the iPhone 6+, apps running in landscape mode on the phone had enough screen real estate to act like they were on a tablet.
Although user interface idioms have made way
for the broader concept of size classes,
UISplit remains a workhorse API for writing Universal apps.
This week, let’s take a closer look at how we can use it
to adapt our UI to a variety of screen sizes.
Let’s start with an example of UISplit
working its magic on a large iPhone:
However, the view doesn’t split when the iPhone is in Zoomed Display mode.
This is one instance of how split views automatically determine when to show split views.
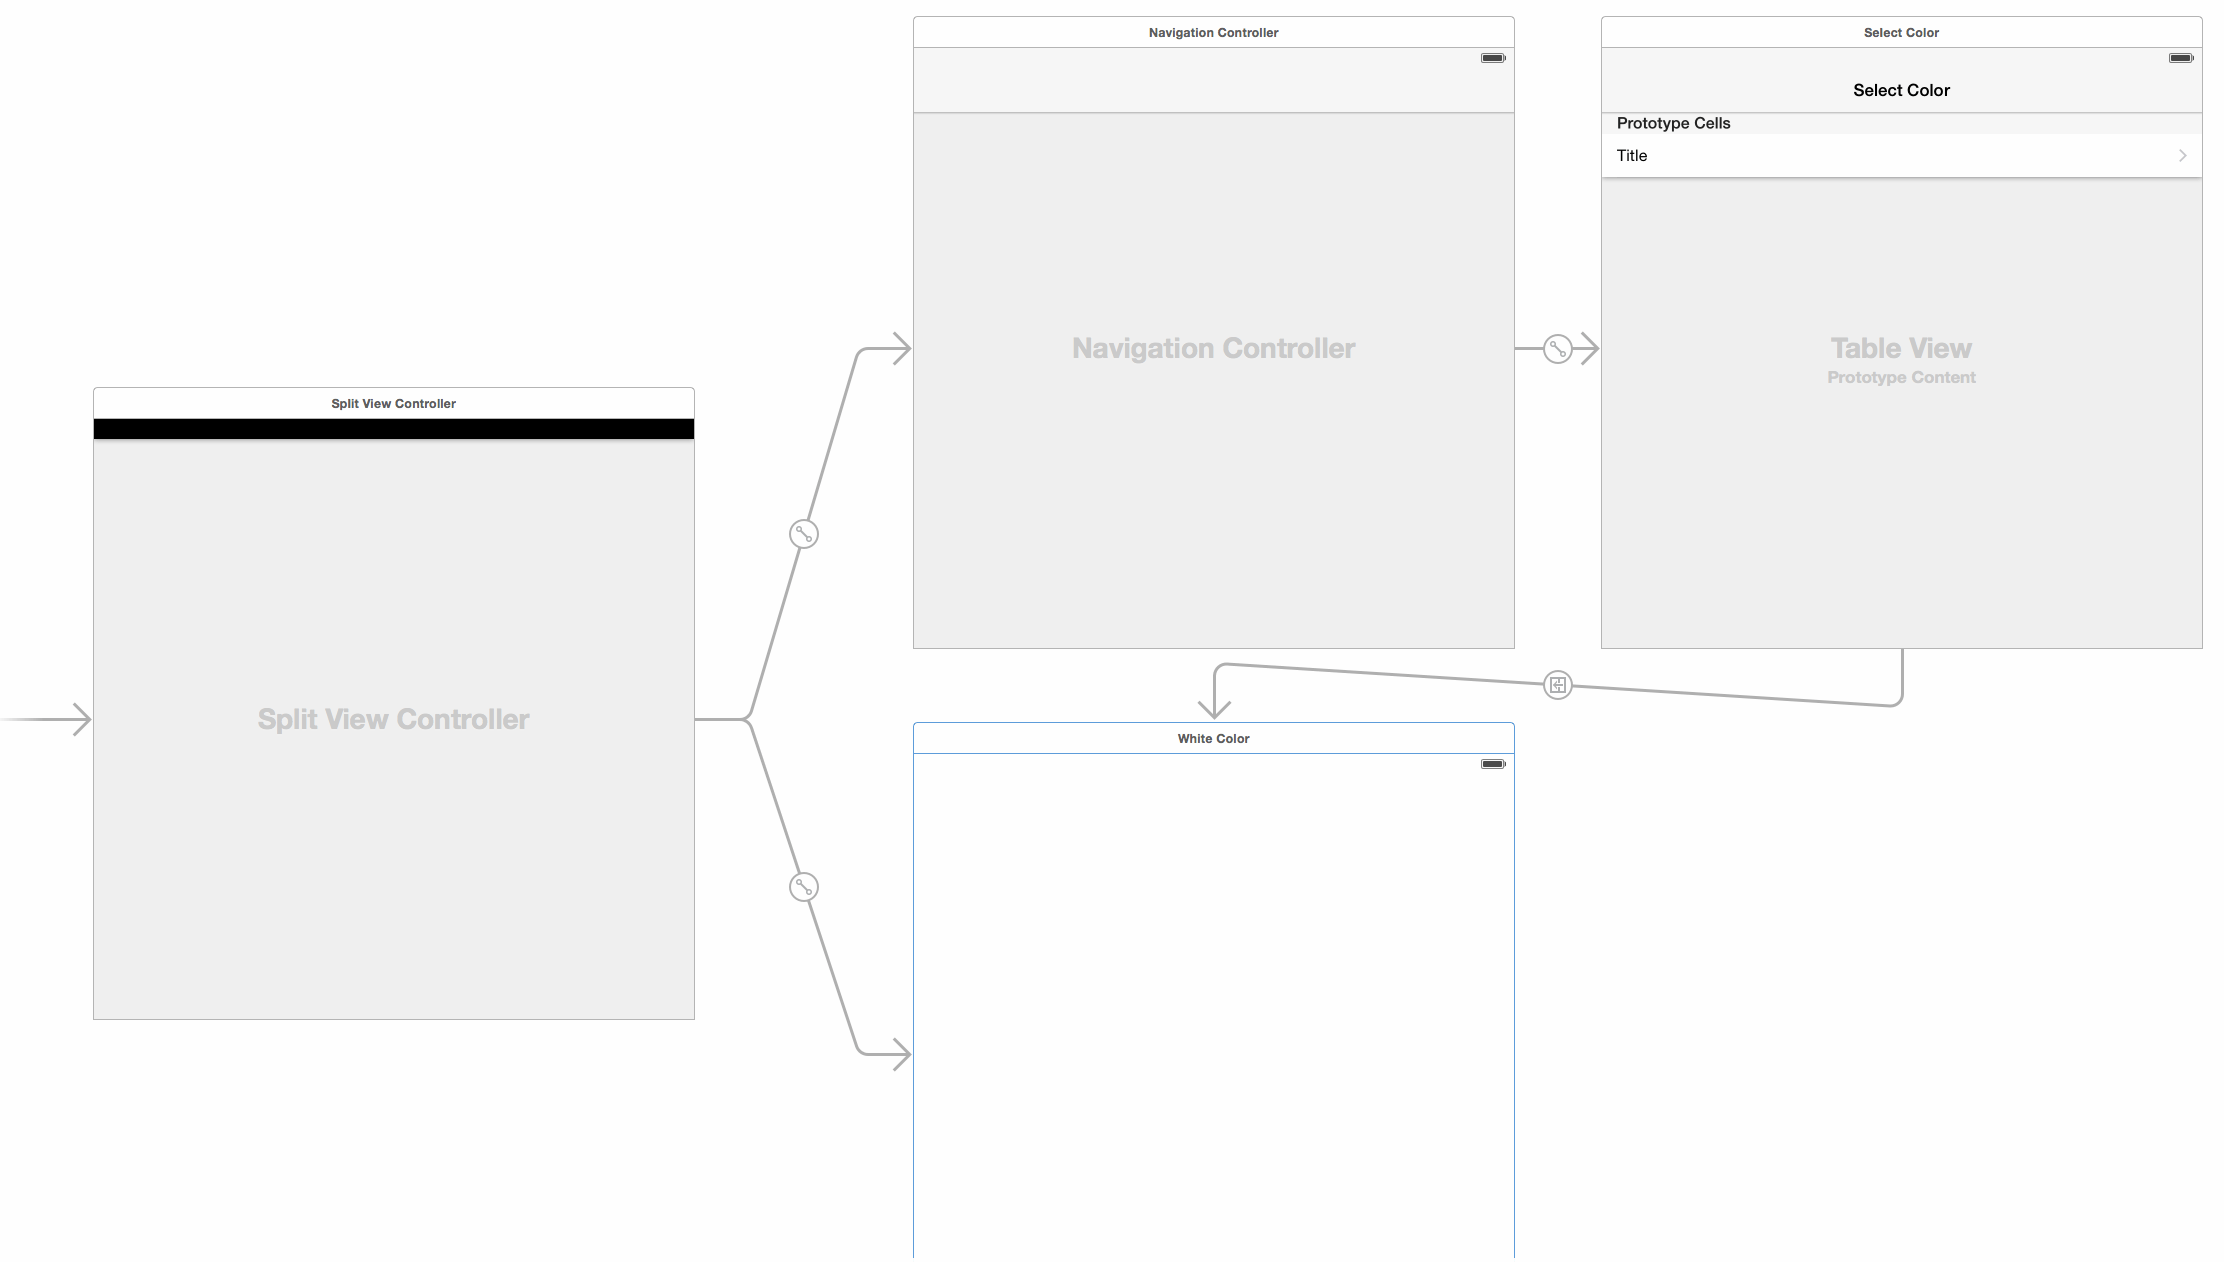
Split View Controller, from Start to Finish
The best way to understand how to use UISplit works
is to show a complete example.
The source code for the example project in this post
can be found here.
The Storyboard Layout
Here’s an overview of what a storyboard layout looks like with a split view controller:
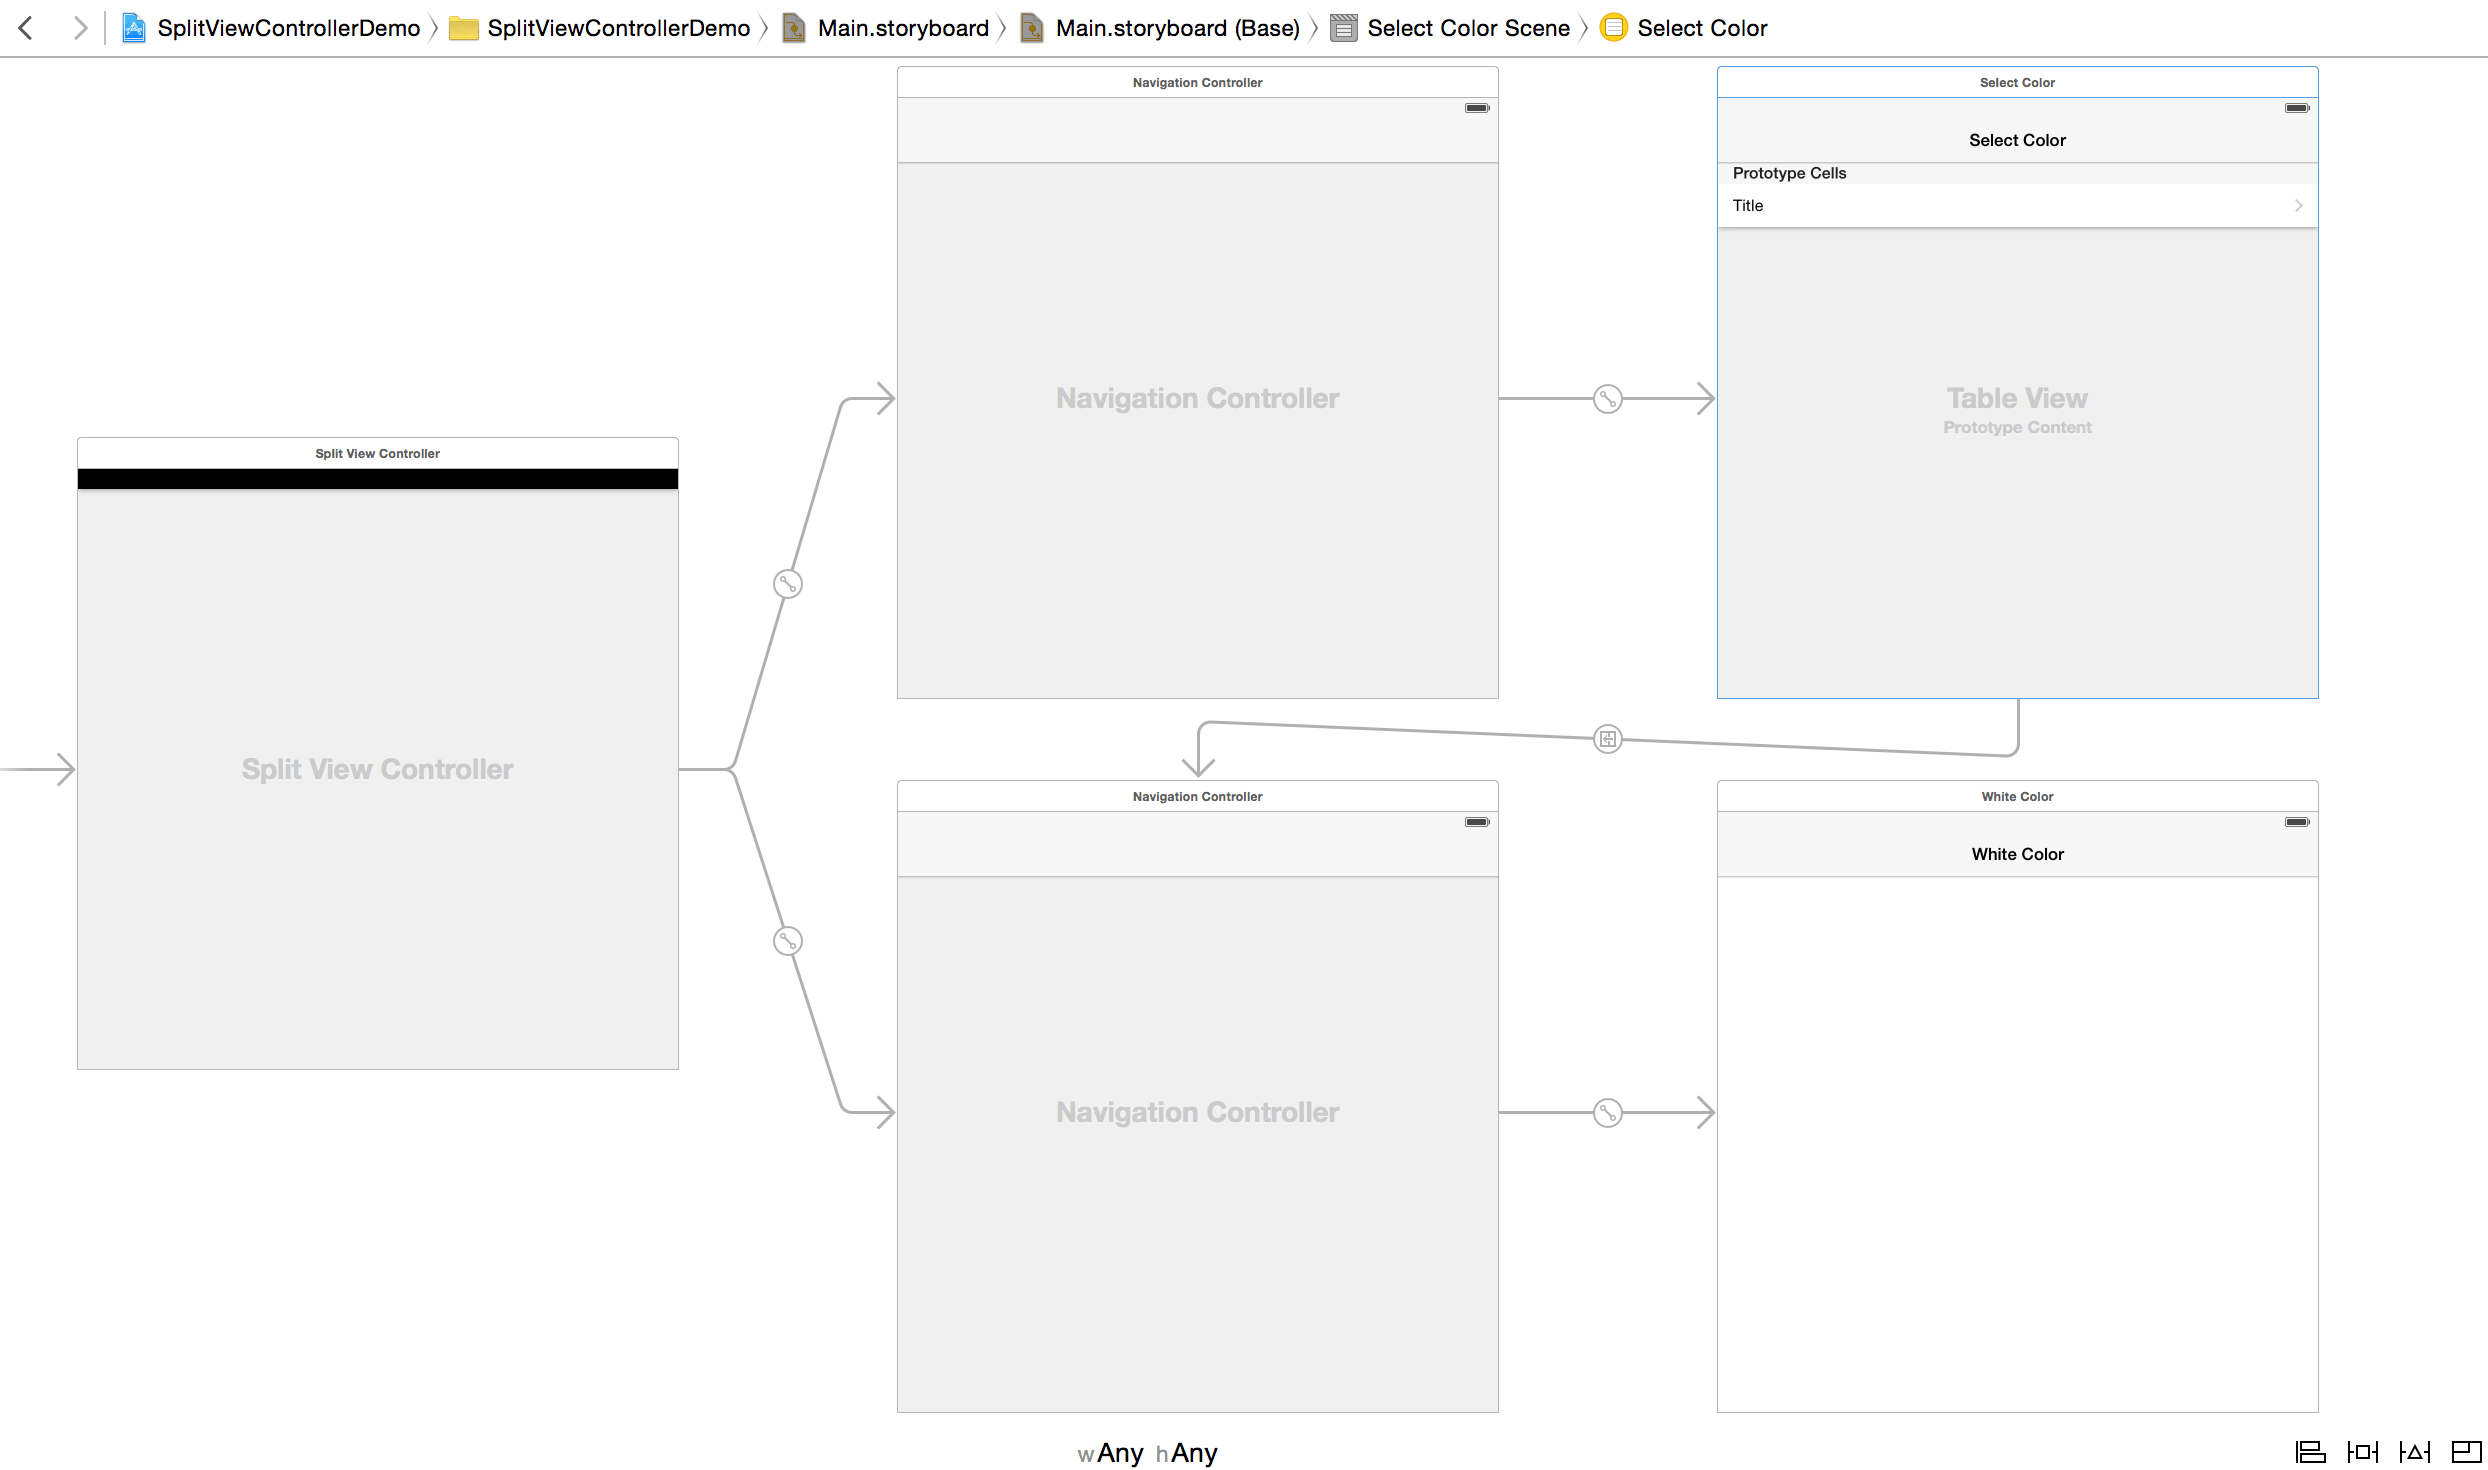
In order to master this concept, let’s dive into more detail.
Master / Detail
The first step to using a UISplit
is dragging it onto the storyboard.
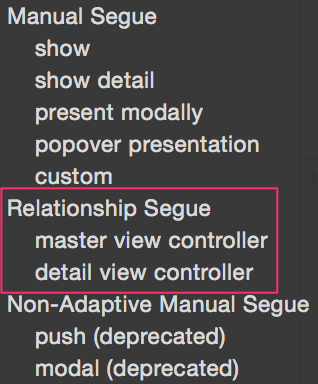
The next step is to specify which view controller is the master
and which one is the detail.
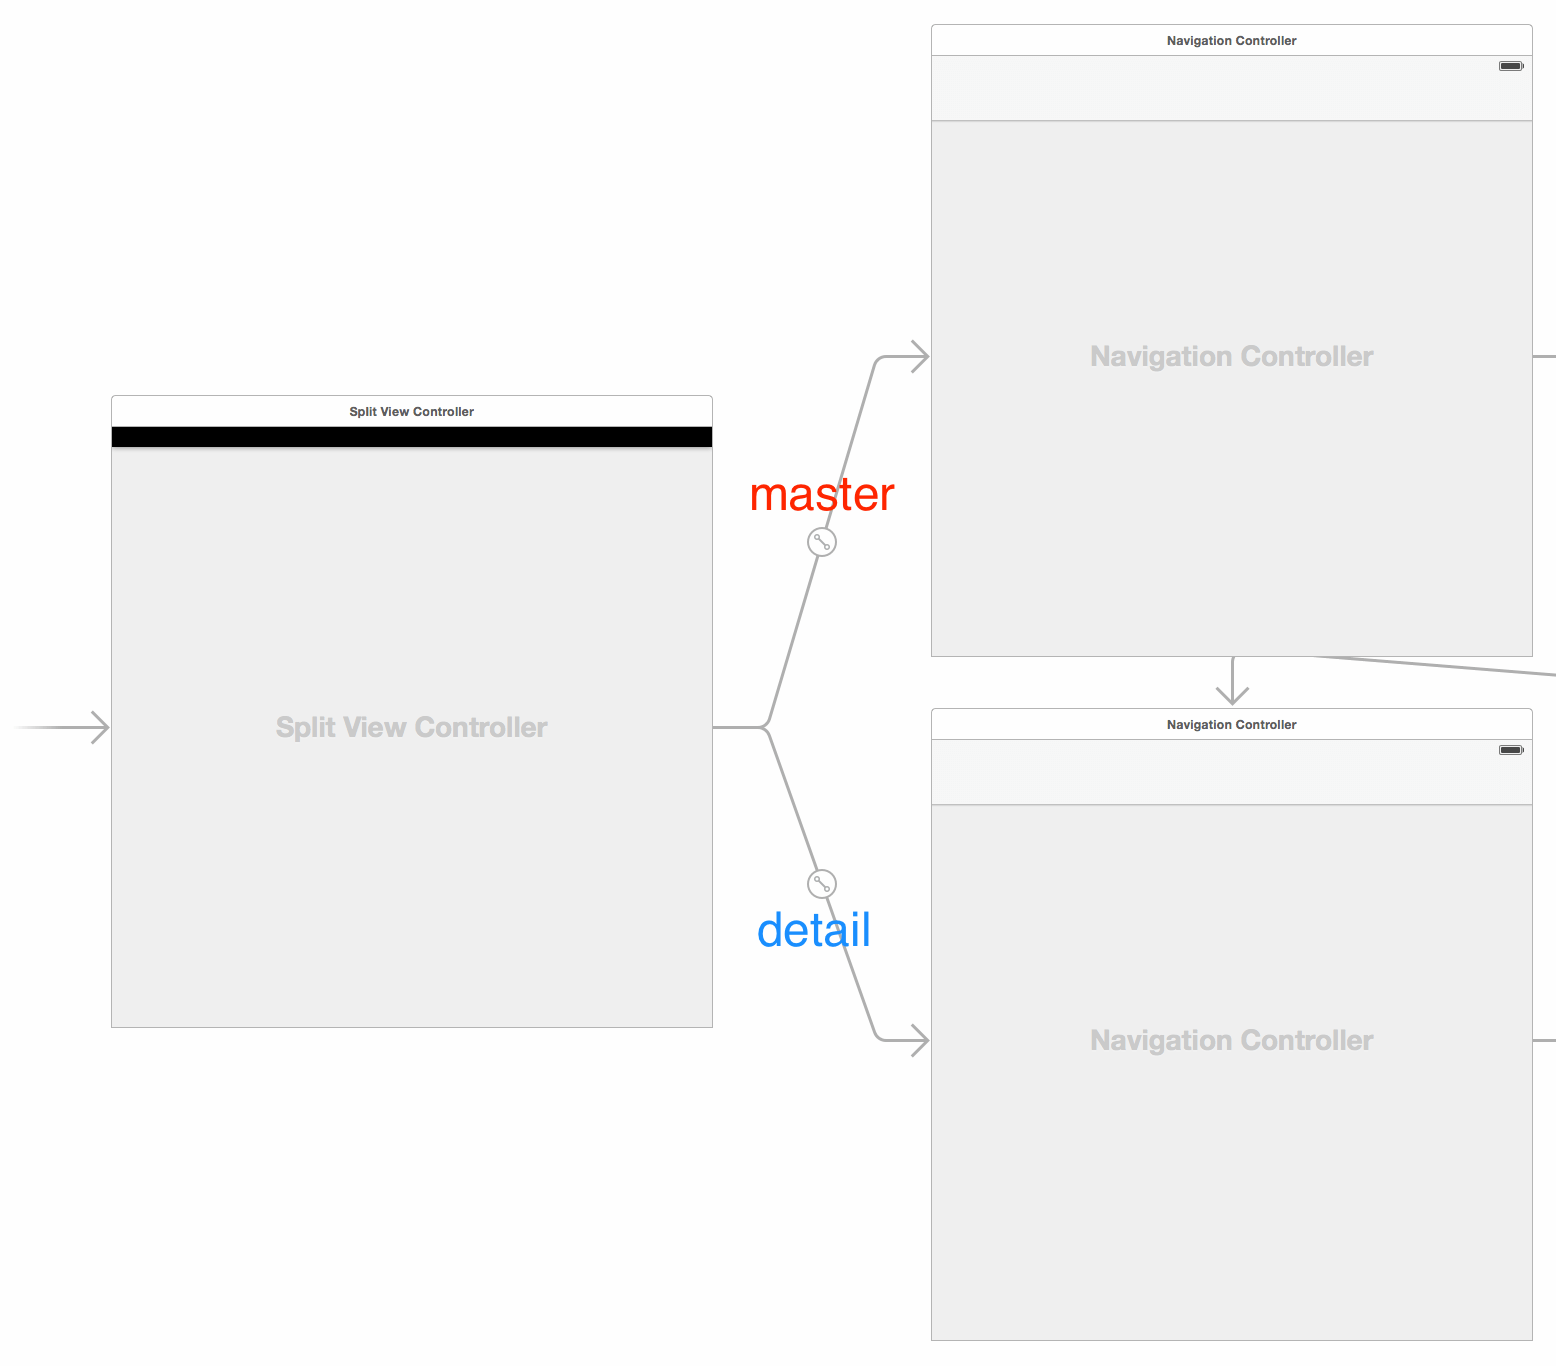
You can do this by selecting the appropriate Relationship Segue:
The master view controller is typically the navigation controller
that contains the list view (a UITable in most cases);
the detail view controller is the navigation controller
that contains the view that shows up when the user taps on the list item.
Show Detail
There’s one last part to making the split view controller work: specifying the “Show Detail” segue.
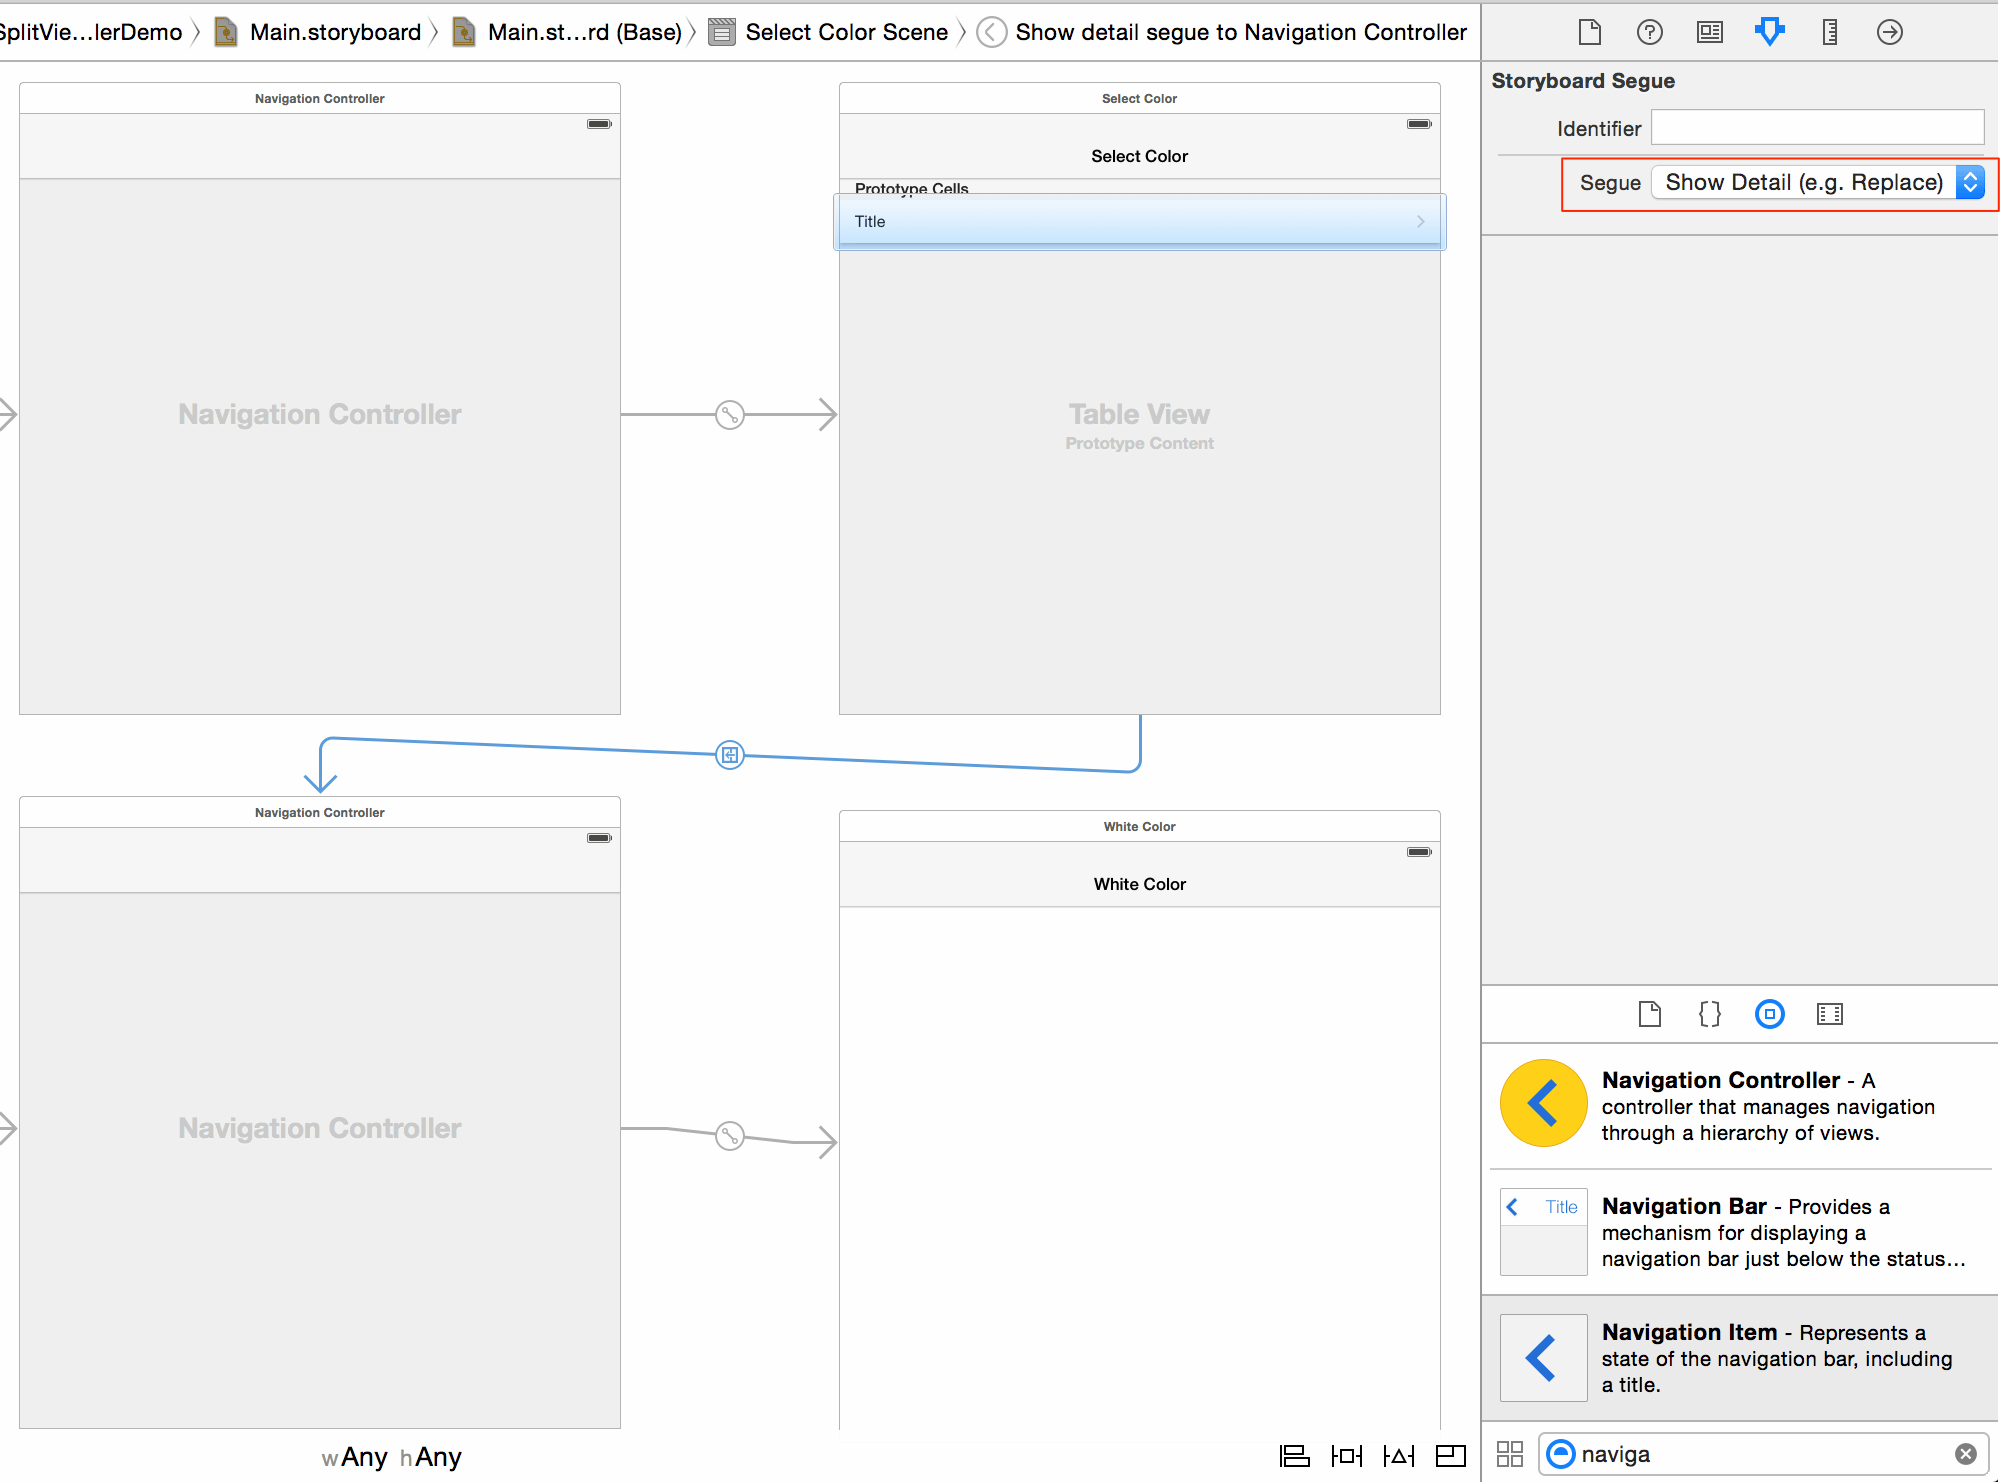
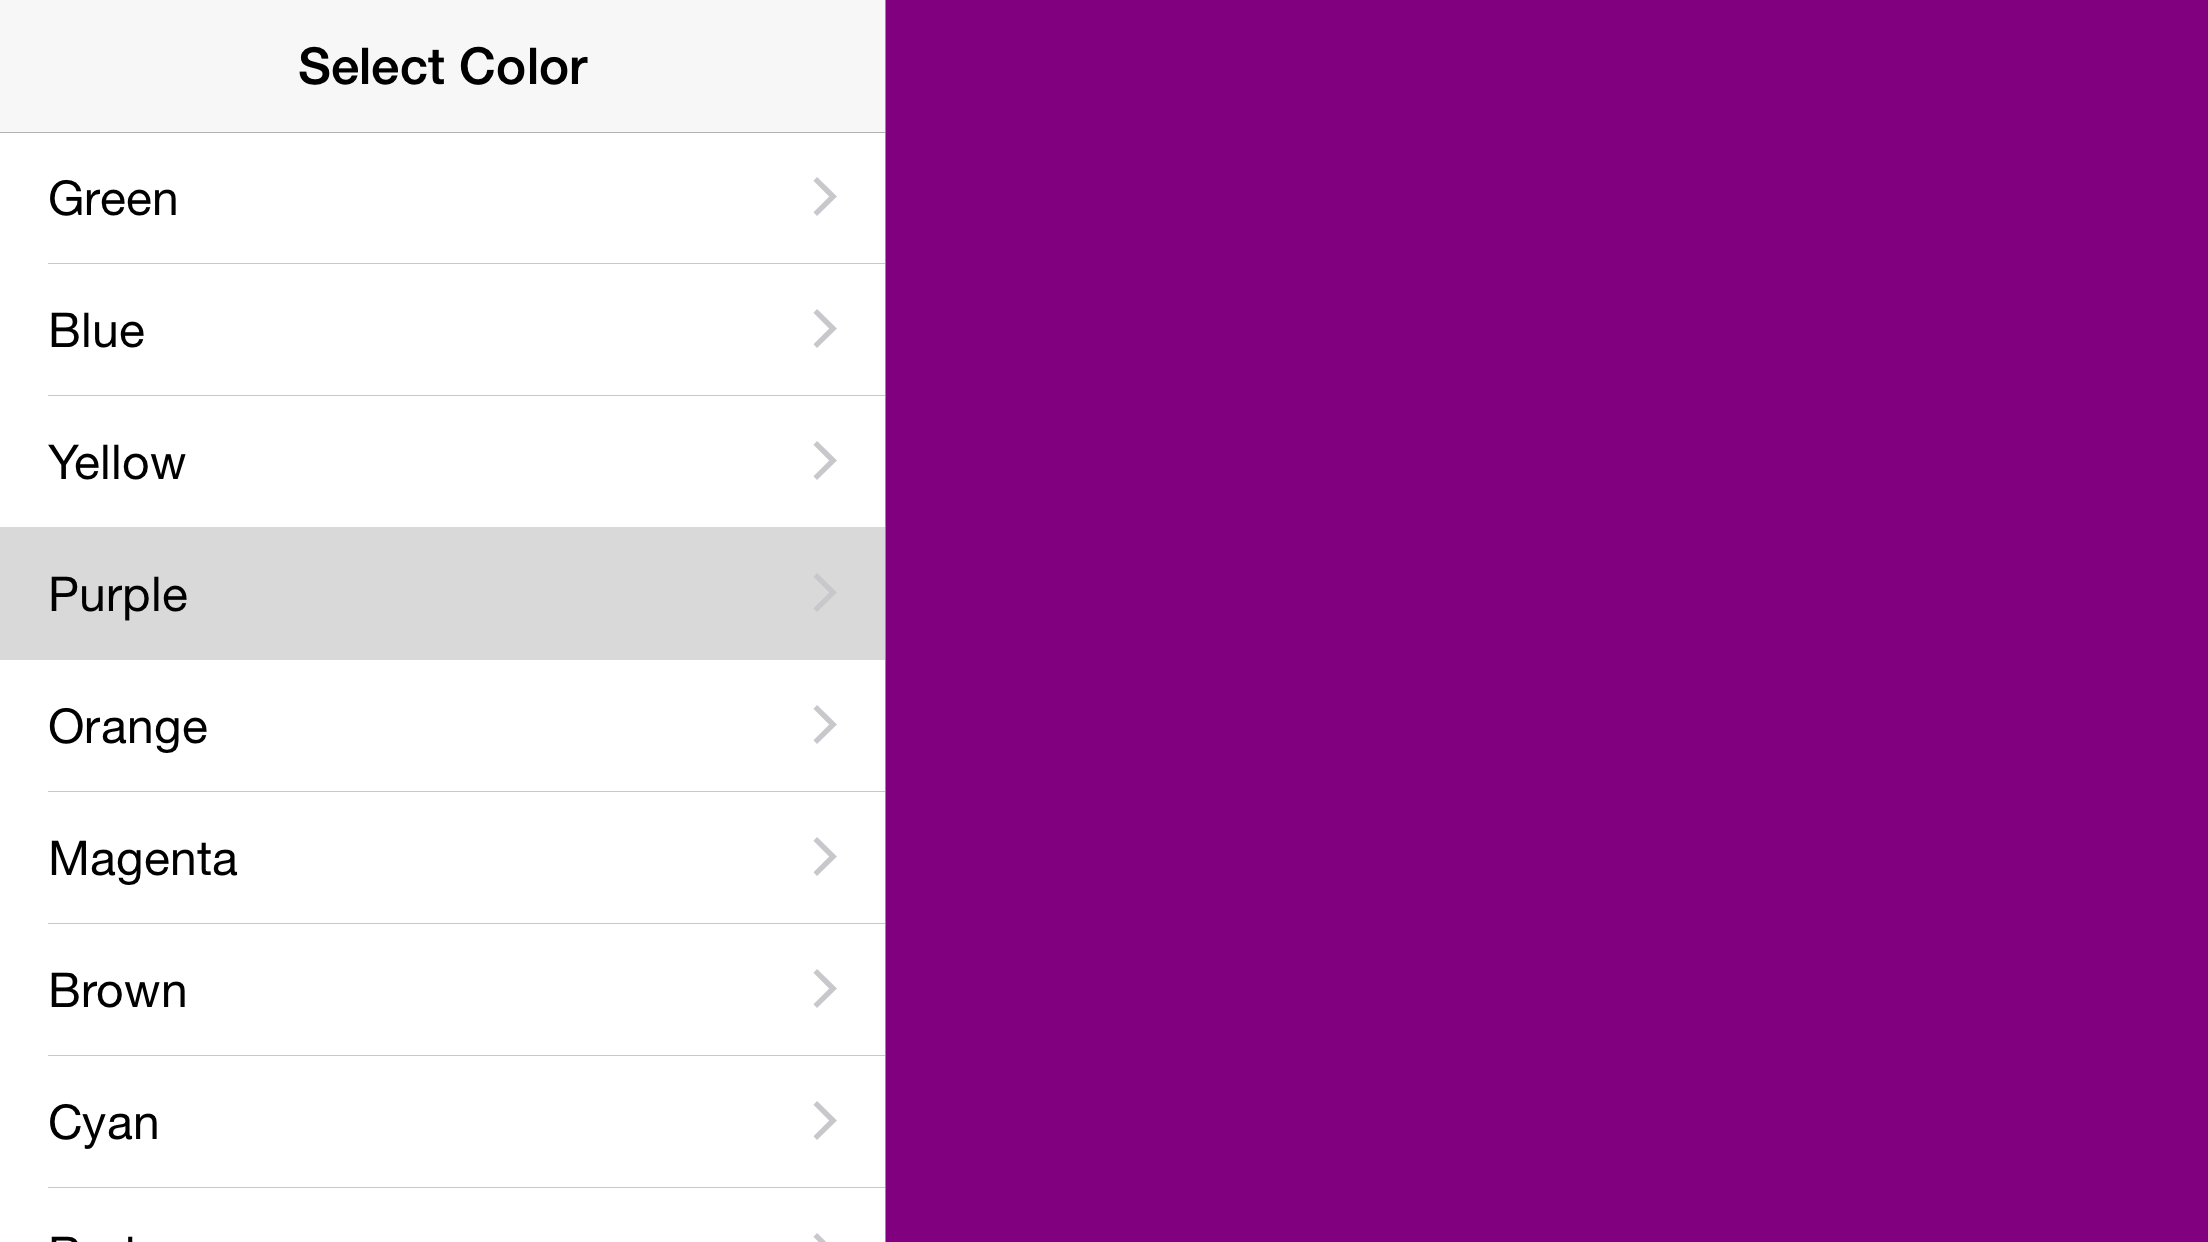
In the example below,
when the user taps on a cell in the Colors,
they’re shown a navigation controller with the Color at its root.
Double Navigation Controllers‽
At this point, you might be wondering: Why do the master and detail view controllers have to be navigation controllers — especially when there’s already a “Show Detail” segue?.
Well, let’s see what happens when the detail view controller doesn’t have a navigation controller at its root:
By all accounts, the app would still work just fine. On a large iPhone, the only difference is the lack of a navigation bar when the phone is in landscape mode:
 )
)
It’s not a big deal unless want your navigation bar to show a title. But this is a deal-breaker on an iPad:
Notice that when the iPad app first launches, there’s no indication that there’s a split view controller at all! To trigger the master view controller, the user has to magically know to swipe left-to-right.
Adding a Display Mode Button
To resolve this issue,
we’re looking for some way to indicate that there’s more to the app
than what’s currently on-screen.
Luckily, UISplit has a display navigation item,
which can be added to the navigation bar
to give us the visual indicator we seek:
override func view- (void)viewBuild and Run on the iPad again, and now you get a nice indication of how access the rest of the app:
The display property lends some nice usability
to apps running on large iPhones in landscape mode, too:
By using display,
you let iOS figure out what’s appropriate
for the current screen size and orientation.
Instead of sweating the small (and big) stuff yourself,
you can sit back and relax. 🍹
Collapse Detail View Controller
There’s one more optimization we can do for the iPhone.
When the user first launches the app,
let’s make the master view controller display fully
until the user selects a list item.
We can do that using
UISplit:
class Colors// SelectNow when the app launches on an iPhone in portrait orientation,
Colors is in full view.
Once the user selects a color
(or the app goes into the background),
Colors is collapsed again,
and Color is displayed:
iOS is always adapting to new capabilities from new hardware. When retina screens were introduced, developers could no longer assume that 1pt = 1px. When larger iPhones were introduced, developers could no longer assume a single screen size.
Today, we’re responsible for accommodating several generations or iPhones and iPads, as well as external displays and various accessibility features. This would be a nightmare if it weren’t for the powerful and thoughtful APIs provided in iOS.
UISplit may not be the newest API on the block
when it comes to adapting to various interface conditions,
but it remains a useful tool for quickly creating robust apps.