CAEmitterLayer
Etymologically, confetti comes from the Italian word for the sugar-coated almond sweet thrown at celebrations, which, in turn, get their name from the Latin conficio: con- (“with, together”) + facio (“do, make”); in another sense, “to celebrate”.
Confetti gets tossed around a lot these days, but not nearly as in the 20th century with its iconic ticker-tape parades down the streets of New York City, like the one welcoming home the Apollo 11 astronauts 50 years ago. Alas, the rise of digital technology made obsolete the stock tickers whose waste paper tape comprised the substrate of those spectacles. And as a result, the tradition has become much less commonplace today.
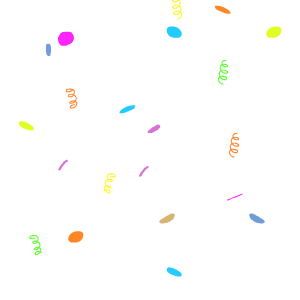
This week mark’s NSHipster’s 7th anniversary! And what better way to celebrate the occasion than to implement a fun and flexible confetti view on iOS?
Let’s dive right in with a quick refresher on the difference between views and layers:
Views and Layers
On iOS, each view is backed by a layer …or perhaps it’s more accurate to say that layers are fronted by view.
Because despite their reputation as the workhorse of UIKit,
UIView delegates the vast majority of its functionality to CALayer.
Sure, views handle touch events and autoresizing,
but beyond that,
nearly everything else between your code and the pixels on screen
is the responsibility of layers.
Among the available CALayer subclasses
in the Quartz Core / Core Animation framework
there are APIs for displaying large amounts of content
by scrolling
and tiling,
there are APIs for doing
advanced
transformations,
and there are APIs that let you get at the bare
metal.
But our focus today is a special class called
CAEmitter.
Particle Emitters
Indeed, particle systems are frequently used to generate fire, smoke, sparks, fireworks, and explosions. But they’re also capable of modeling… less destructive phenomena like rain, snow, sand, and — most importantly — confetti.
CAEmitter configures the position and shape of
where particles are emitted.
As to the specific behavior and appearance of those particles,
that’s determined by the CAEmitter objects seeded to the emitter layer.
By analogy:
-
CAEmittercontrols the size, position, and intensity of a confetti cannon,Layer -
CAEmittercontrols the size, shape, color, and movement of each type of confetti loaded into the hopper.Cell
If you wanted confetti with
black mustaches, orange birds, and purple aardvarks,
then you’d load a CAEmitter with three different CAEmitter objects,
each specifying its color, contents, and other behaviors.
Particle Emitter Cells
The secret to CAEmitter’s high performance
is that it doesn’t track each particle individually.
Unlike views or even layers,
emitted particles can’t be altered once they’re created.
(Also, they don’t interact with one another,
which makes it easy for them to be rendered in parallel)
Instead,
CAEmitter has an enormous API surface area
to configure every aspect of particle appearance and behavior
before they’re generated, including
birth rate, lifetime,
emission angles, velocity, acceleration,
scale, magnification filter, color —
too many to cover in any depth here.
In general, most emitter cell behavior is defined by either a single property or a group of related properties that specify a base value along with a corresponding range and/or speed.
A range property specifies the maximum amount
that can be randomly added or subtracted from the base value.
For example,
the scale property determines the size of each particle,
and the scale property specifies the
upper and lower bounds of possible sizes relative to that base value;
a scale of 1.0 and a scale of 0.2
generates particles sized between
0.8× and 1.2× the original contents size.
Cell emitter behavior may also have a corresponding speed property,
which specify the rate of growth or decay over the lifetime of the particle.
For example,
with the scale property,
positive values cause particles to grow over time
whereas negative values cause particles to shrink.
Loaded up with a solid understanding of the ins and outs of CAEmitter,
now’s the time for us to let that knowledge spew forth in a flurry of code!
Implementing a Confetti View for iOS
First, let’s define an abstraction for the bits of confetti that we’d like to shoot from our confetti cannon. An enumeration offers the perfect balance of constraints and flexibility for our purposes here.
enum Content {
    enum Shape {
        case circle
        case triangle
        case square
        case custom(CGPath)
    }

    case shape(Shape, UIColor?)
    case image(UIImage, UIColor?)
    case emoji(Character)
}
Here’s how we would configure our confetti cannon to shoot out a colorful variety of shapes and images:
let contents: [Content] = [
.shape(.circle, .purple),
.shape(.triangle, .lightCreating a CAEmitterLayer Subclass
The next step is to implement the emitter layer itself.
The primary responsibility of CAEmitter
is to configure its cells.
Confetti rains down from above
with just enough variation in its size, speed, and spin to make it interesting.
We use the passed array of Content values
to set the contents of the cell (a CGImage)
and a fill color (a CGColor).
private final class Layer: CAEmitterWe’ll call this configure(with:) method from our confetti view,
which will be our next and final step.
Implementing ConfettiView
We want our confetti view to emit confetti for a certain amount of time and then stop. However, accomplishing this is surprisingly difficult, as evidenced by the questions floating around on Stack Overflow.
The central problem is that Core Animation operates on its own timeline, which doesn’t always comport with our own understanding of time.
For instance,
if you neglect to initialize the begin of the emitter layer
with CACurrent right before it’s displayed,
it’ll render with the wrong time space.
As far as stopping goes:
you can tell the layer to stop emitting particles
by setting its birth property to 0.
But if you start it again up
by resetting that property to 1,
you get a flurry of particles filling the screen
instead of the nice initial burst on the first launch.
Suffice to say that there are myriad different approaches to making this behave as expected. But here’s the best solution we’ve found for handling starting and stopping, as well as having more than one emitter at the same time:
Going back to our original explanation for a moment,
each instance of UIView
(or one of its subclasses)
is backed by a single, corresponding instance of CALayer
(or one of its subclasses).
A view may also host one or more additional layers,
either as siblings or children to the backing layer.
Taking advantage of this fact, we can create a new emitter layer each time we fire our confetti cannon. We can add that layer as a hosted sublayer for our view, and let the view handle animation and disposal of each layer in a nice, self-contained way.
private let kThere’s a lot of code to unpack here, so let’s focus on its distinct parts:
- ❶
- First, we create an instance of our custom
CAEmittersubclass (creatively namedLayer Layerhere, because it’s a private, nested type). It’s set up with ourconfigure(with:)method from before and added as a sublayer. Theneedsproperty defaults toDisplay On Bounds Change falsefor whatever reason; setting it totruehere allows us to better handle device trait changes (like rotation or moving to a new window). - ❷
- Next, we create a keyframe animation
to taper the
birthproperty down toRate 0over the specified duration. - ❸
- Then we add that animation in a transaction and use the completion block to set up a fade-out transition. (We set the view as the transition’s animation delegate, as described in the next session)
- ❹
- Finally, we use key-value coding to create a reference between the emitter layer and the transition so that it can be referenced and cleaned up later on.
Adopting the CAAnimationDelegate Protocol
To extend our overarching metaphor,
CAAnimation is
that little cartoon janitor from Rocky and Bullwinkle
with a push broom at the end of the ticker-tape parade.
The animation delegate method is called
when our CATransition finishes.
We then get the reference to the calling layer
in order to remove all animations and remove it from its superlayer.
// MARK: - CAAnimationThe end result: it’s as if NSHipster.com were parading down the streets of New York City (or rather, Brooklyn, if you really wanted to lean into the hipster thing)
The full Confetti source
is available on GitHub,
and can be easily integrated into your project using
CocoaPods.
But ending on such a practical note doesn’t make for a particularly snazzy conclusion. So instead, how about a quick bonus round detailing seven other ways that you could implement confetti instead:
✨Bonus ✨ 7 Alternative Approaches to Confetti
SpriteKit Particle System
SpriteKit is the cooler, younger cousin to UIKit, providing nodes to games rather than views to apps. On their surface, they couldn’t look more different from one another. And yet both share a common, deep reliance on layers, which makes for familiar lower-level APIs.
The comparison between these two frameworks goes even deeper, as you’ll find if you open File > New, scroll down to “Resource” and create a new SpriteKit Particle System file. Open it up, and Xcode provides a specialized editor reminiscent of Interface Builder.
Call up your designed SKEmitter by name
or reimplement in code
(if you’re the type to hand-roll all of your UIViews)
for a bespoke confetti experience.
SceneKit Particle System
Again with the metaphors, SceneKit is to 3D what SpriteKit is to 2D.
In Xcode 11, open File > New, select SceneKit Scene File under the “Resource” heading, and you’ll find an entire 3D scene editor — right there in your Xcode window.

Add in a dynamic physics body and a turbulence effect, and you can whip up an astonishingly capable simulation in no time at all (though if you’re like me, you may find yourself spending hours just playing around with everything)
UIKit Dynamics
At the same time that SpriteKit entered the scene, you might imagine that UIKit started to get self-conscious about the “business only” vibe it was putting out.
So in iOS 7,
in a desperate attempt to prove itself cool to its “fellow kids”
UIKit added UIDynamic as part of a set of APIs known as
“UIKit Dynamics”.
Feel free to
read our article on UIField
and make confetti out of your app,
if you like.
HEVC Video with Alpha Channel
Good news! Later this year, AVFoundation adds support for alpha channels in HEVC video! So if, say, you already had a snazzy After Effects composition of confetti, you could export that with a transparent background and composite it directly to your app or on the web.
For more details, check out WWDC 2019 Session 506.
Animated PNGs
Of course, this time next year, we’ll still be sending animated GIFs around to each other, despite all of their shortcomings.
Animated GIFs are especially awful for transparency. Without a proper alpha channel, GIFs are limited to a single, transparent matte color, which causes unsightly artifacts around edges.
We all know to use PNGs on the web for transparent images, but only a fraction of us are even aware that APNG is even a thing.
Well even fewer of us know that iOS 13 adds native support for APNG
(as well as animated GIFs — finally!).
Not only were there no announcements at WWDC this year,
but the only clue of this new feature’s existence is
an API diff between Xcode 11 Beta 2 and 3.
Here’s the documentation stub for the function,
CGAnimate
And if you think that’s (unfortunately) par for the course these days,
it gets worse.
Because for whatever reason,
the relevant header file (Image)
is inaccessible in Swift!
Now, we don’t really know how this is supposed to work, but here’s our best guess:
// ⚠️ Expected Usage
let imageMeanwhile, animated PNGs have been supported in Safari for ages, and with a far simpler API:
<img src="animated.png" />
WebGL
Speaking of the web, let’s talk about a shiny, new(-ish) web standard called WebGL.
With just a few hundred lines of JavaScript and GL shader language,
you too can render confetti to your very own blog about
web development
Objective-C, Swift, and Cocoa.
Emoji
But really, we could do away with all of this confetti and express ourselves much more simply:
let mood = "🥳"
It’s hard to believe that it’s been seven years since I started this site. We’ve been through a lot together, dear reader, so know that your ongoing support means the world to me. Thanks for learning with me over the years.
Until next week: May your code continue to compile and inspire.